> ## Documentation Index
> Fetch the complete documentation index at: https://www.krea.ai/docs/llms.txt
> Use this file to discover all available pages before exploring further.

# Seedance Studio: direct cinematic AI images and videos

> Direct cinematic AI images and videos in Seedance Studio with prompts, reference images, custom looks, color palettes, annotations, and 3D camera paths.

Seedance Studio is a desktop workspace for directing cinematic images and videos. Write a prompt, add references, choose visual direction, and iterate without leaving the project.

<Note>
  Seedance Studio is currently available on desktop. The models, settings, and reference types you can use depend on whether you select **Image** or **Video** and which model you choose.
</Note>

<a href="https://www.krea.ai/seedance-studio" className="not-prose group my-6 flex items-center justify-between gap-4 rounded-xl border border-gray-200 dark:border-gray-800 px-5 py-4 no-underline transition-colors hover:border-gray-300 dark:hover:border-gray-700">
  <div>
    <div className="font-semibold text-gray-900 dark:text-gray-100">Open Seedance Studio</div>
    <div className="mt-0.5 text-sm text-gray-500 dark:text-gray-400">Direct an image or video in one workspace.</div>
  </div>

  <span aria-hidden="true" className="text-gray-400 transition-transform group-hover:translate-x-0.5 dark:text-gray-500">→</span>
</a>

<Frame>
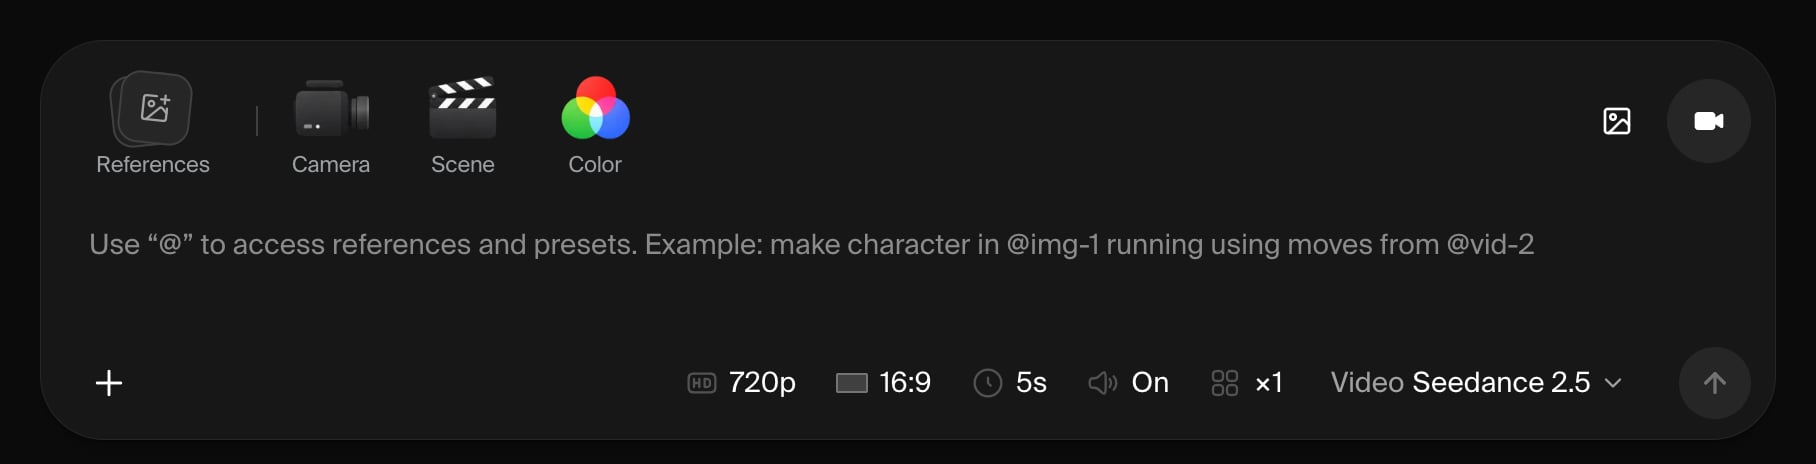
  <img src="https://mintcdn.com/krea/i2ZUkaczdcYgkWjo/images/seedance-studio-composer.png?fit=max&auto=format&n=i2ZUkaczdcYgkWjo&q=85&s=b843ac2a7d691c769e5428fdadf534e9" alt="Seedance Studio composer with reference, camera, scene, color, output, and model controls." width="1816" height="464" data-path="images/seedance-studio-composer.png" />
</Frame>

## Quick start

<Steps>
  <Step title="Choose Image or Video">
    Select the output type above the prompt, then choose a model. Set any options the model provides, such as aspect ratio, resolution, duration, audio, quality, or number of results.
  </Step>

  <Step title="Describe the shot">
    Write the subject, action, setting, and mood you want. For video, include the action or change that should happen during the clip.
  </Step>

  <Step title="Add references">
    Click **+** or **Add References**, then upload or choose an asset. You can also paste or drag files into the composer. Type `@` in the prompt to find an attached asset or search Studio's direction presets.

    Use references when the subject, composition, style, or motion should follow existing media. Supported image, video, and audio references vary by model.
  </Step>

  <Step title="Add visual direction">
    In Video mode, use **Camera**, **Scene**, and **Color** to shape the shot. Browse the visual tiles; video examples play on hover. Click a tile to add it to your prompt, or skip this step and let the model decide.
  </Step>

  <Step title="Generate">
    Click the arrow or press **Enter**. Use **Shift + Enter** when you want a new line in the prompt.
  </Step>

  <Step title="Refine the result">
    Results appear in the project feed. Each finished result gets an `@tag`; click it to attach and mention that result in your next prompt. You can also reuse its parameters, download it, or adjust the prompt and generate again.
  </Step>
</Steps>

## Choose the right direction control

These controls appear in Video mode. Use search or the category rail to narrow the visual picker.

<Frame>
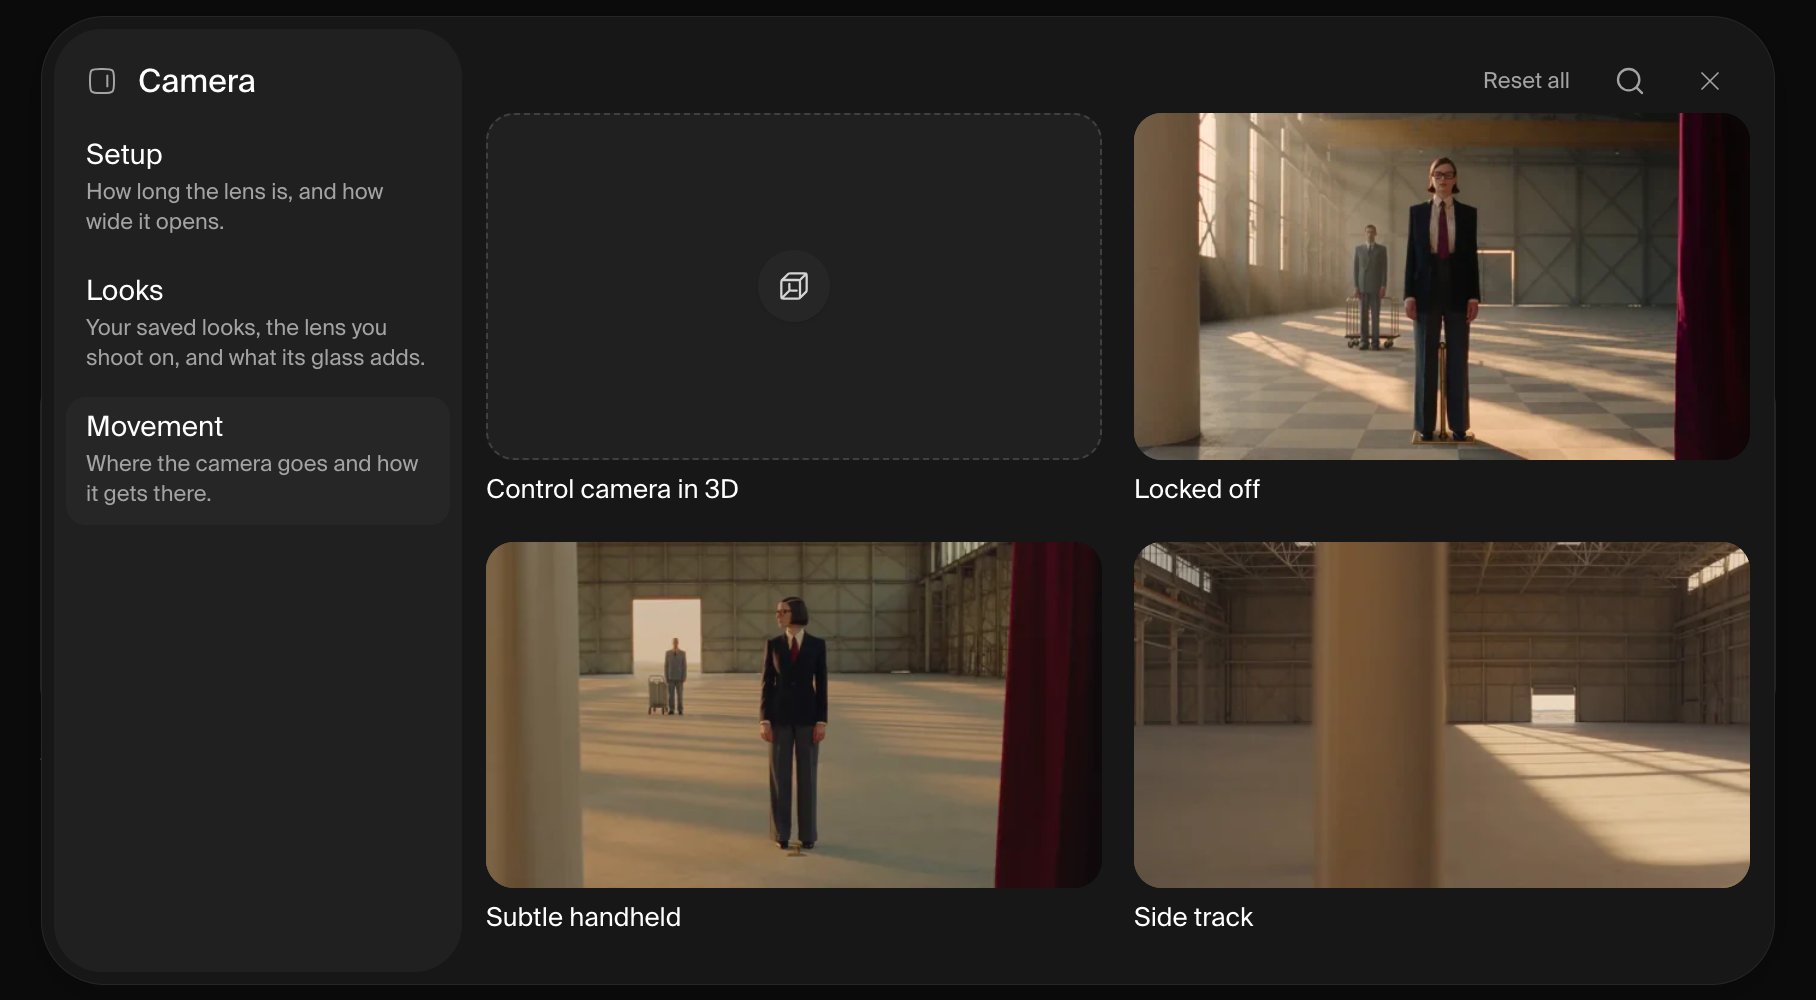
  <img src="https://mintcdn.com/krea/i2ZUkaczdcYgkWjo/images/seedance-studio-camera-movement.png?fit=max&auto=format&n=i2ZUkaczdcYgkWjo&q=85&s=078b9288562843e4672652a1c0034a7c" alt="Camera Movement tab with 3D camera control and visual movement examples." width="1816" height="1000" data-path="images/seedance-studio-camera-movement.png" />
</Frame>

| Control                 | Use it when you want to                                                                                                                                                     |
| ----------------------- | --------------------------------------------------------------------------------------------------------------------------------------------------------------------------- |
| **Camera → Setup**      | Set focal length (8mm–100mm Macro) and aperture (f/1.4–f/11) with snap sliders. The preview updates as you adjust them; choose a value or leave either control on **Auto**. |
| **Camera → Looks**      | Add lens character or optical texture, such as anamorphic glass, grain, bloom, or diffusion.                                                                                |
| **Camera → Movement**   | Choose how the camera moves. Hover over a tile to see the movement before selecting it.                                                                                     |
| **Scene → Style**       | Set the scene's mood and pacing.                                                                                                                                            |
| **Scene → Structure**   | Choose a single shot, continuous take, montage, loop, or another sequence structure.                                                                                        |
| **Scene → Performance** | Direct how restrained, natural, expressive, or theatrical the action feels.                                                                                                 |
| **Scene → Lighting**    | Choose the light source and shadow character.                                                                                                                               |
| **Color → Palette**     | Apply a curated color grade or a palette you saved.                                                                                                                         |

<Tip>
  Start with a prompt and references, then add only the controls that matter. Leaving focal length or aperture on **Auto** gives the model freedom to choose.
</Tip>

## Create a custom look

Use a custom look to reuse the visual language of a reference frame without attaching that frame to every generation.

1. Open **Camera → Looks** and click **New look**.
2. Optionally choose what Studio should study: camera, lighting, color, texture, technique, atmosphere, or composition.
3. Upload an image, then review and edit the generated notes. If you change the focus areas afterward, click **Read again**.
4. Name and save the look. Studio selects it automatically; you can find it under the **Custom** filter later.

<Note>
  The uploaded image is used to create editable direction notes; the image itself is not sent to the generation model. Attach it as a regular reference as well when its subject or composition must be followed directly.
</Note>

## Create a custom color palette

1. Open **Color → Palette** and click **New palette**.
2. Upload an image to extract its colors, or add colors manually with hex values.
3. Adjust the palette, give it a name, and save it.
4. Studio selects the new palette automatically; you can find it under the **Custom** filter later.

Only one palette can be active at a time. Click the selected palette again to clear it.

## Annotate a reference

Use annotations when a prompt alone is not precise enough to explain placement or an edit.

1. Click **Annotate Assets** or **Annotate**.
2. Choose an existing asset, upload an image, or start with a blank 16:9 canvas.
3. Draw or place comments on the canvas.
4. Confirm the edit. Studio saves a flattened copy, adds it to the project feed, and uses it in the current prompt. If you edited an attached reference, the copy replaces the original in the same slot.

## Control the camera in 3D

Use the 3D camera editor when a preset movement is not specific enough.

1. Click **3D Camera Control** or **Create 3D scene**, or open **Camera → Movement → Control camera in 3D**.
2. Describe the scene, upload a reference, or sketch a layout. The scene agent can build and revise a simple 3D scene for you.
3. Add camera keyframes, then adjust their position, aim, focal length, timing, and easing. Preview the path and set a duration from 1 to 10 seconds.
4. Click **Use video** to attach the rendered camera path to your Studio prompt, or **Export** to download it.

**Use video** renders the flythrough, adds it to the project feed, and attaches it as a video reference for your next generation.

## Work with your results

The project feed keeps generated images, videos, annotations, and 3D camera-path renders together. You can also add files directly to the feed after your first result. From a result, you can:

* use it as a reference in the next prompt;
* favorite, download, share, organize, or delete it;
* for generated images and videos, reuse the prompt, model, references, direction, and settings;
* for camera-path renders, reopen the original 3D scene.

If Studio will not switch from Video to Image, remove any video or audio references and their `@` mentions first. If a preset cannot be added, remove a reference or start/end frame as prompted; support and limits vary by model.