Requesting a Refund
Eligibility Requirements
To be eligible for a refund, you must meet the following criteria:- Active subscription: You must have an active paid subscription
- Usage limit: You must have used less than 650 lifetime compute units
- Timing: Refund requests are typically processed for recent charges
How to Request a Refund
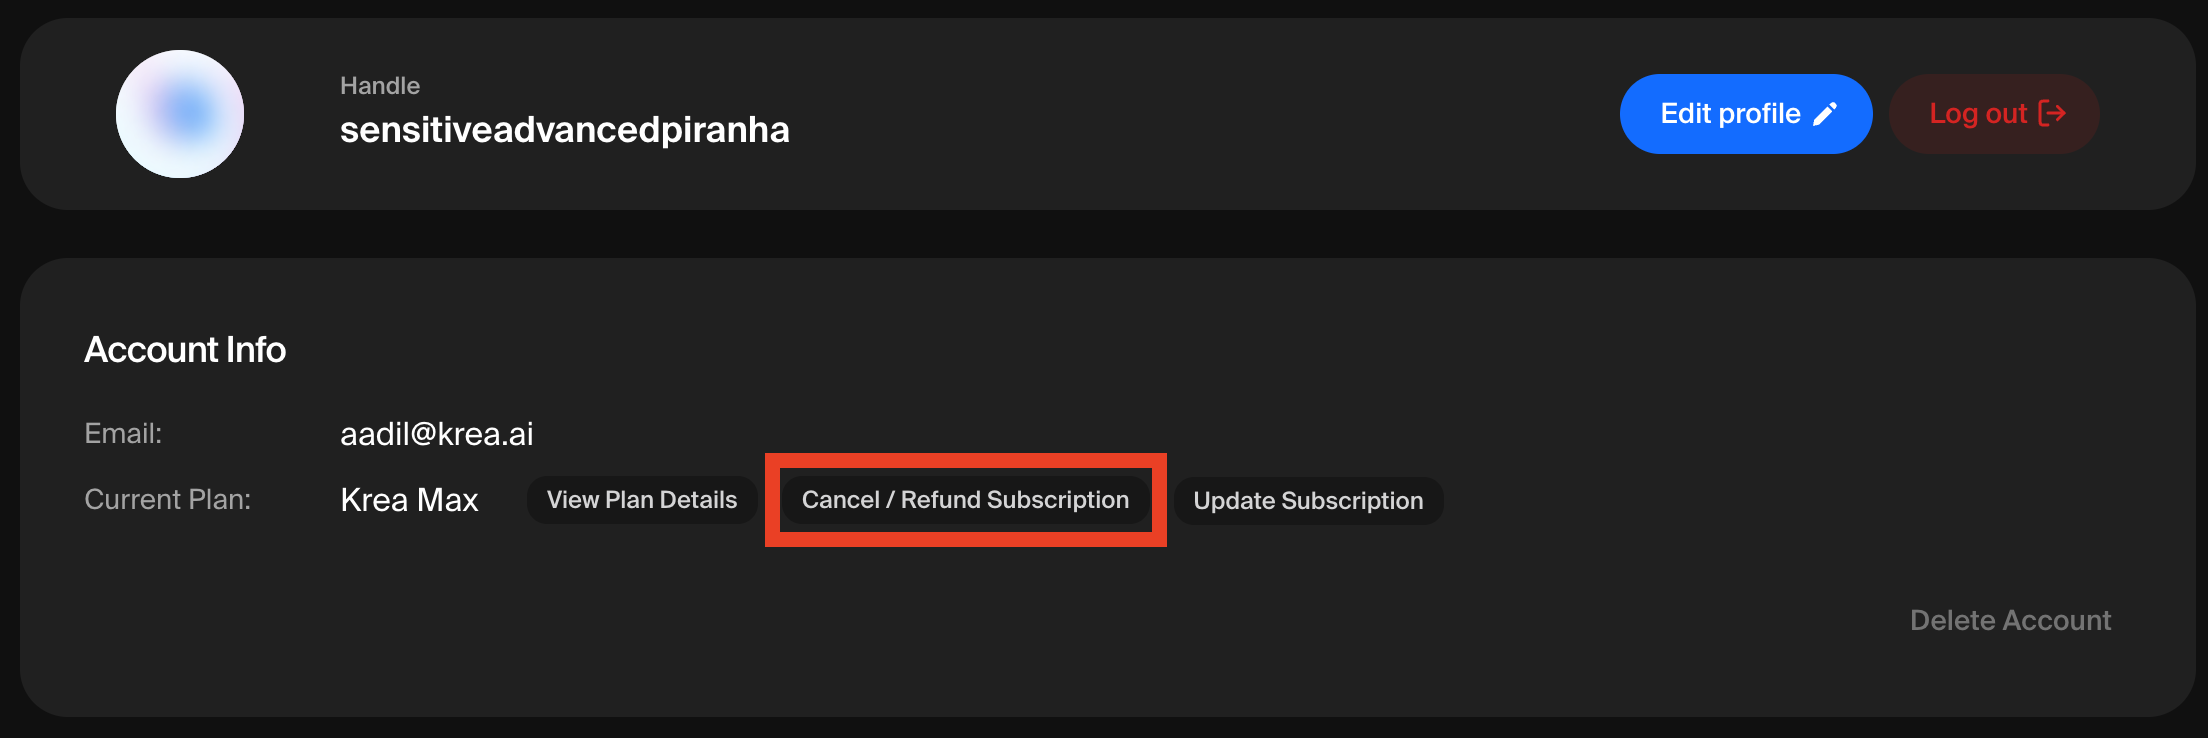
- Navigate to Account Details
- Log in to your Krea.ai account
- Go to your Account Details page
- Check Your Usage
- Review your compute unit usage on the usage statistics section
- Ensure you have used less than 650 lifetime compute units
- Submit Refund Request
-
Click on the “Cancel/Refund Subscription” button
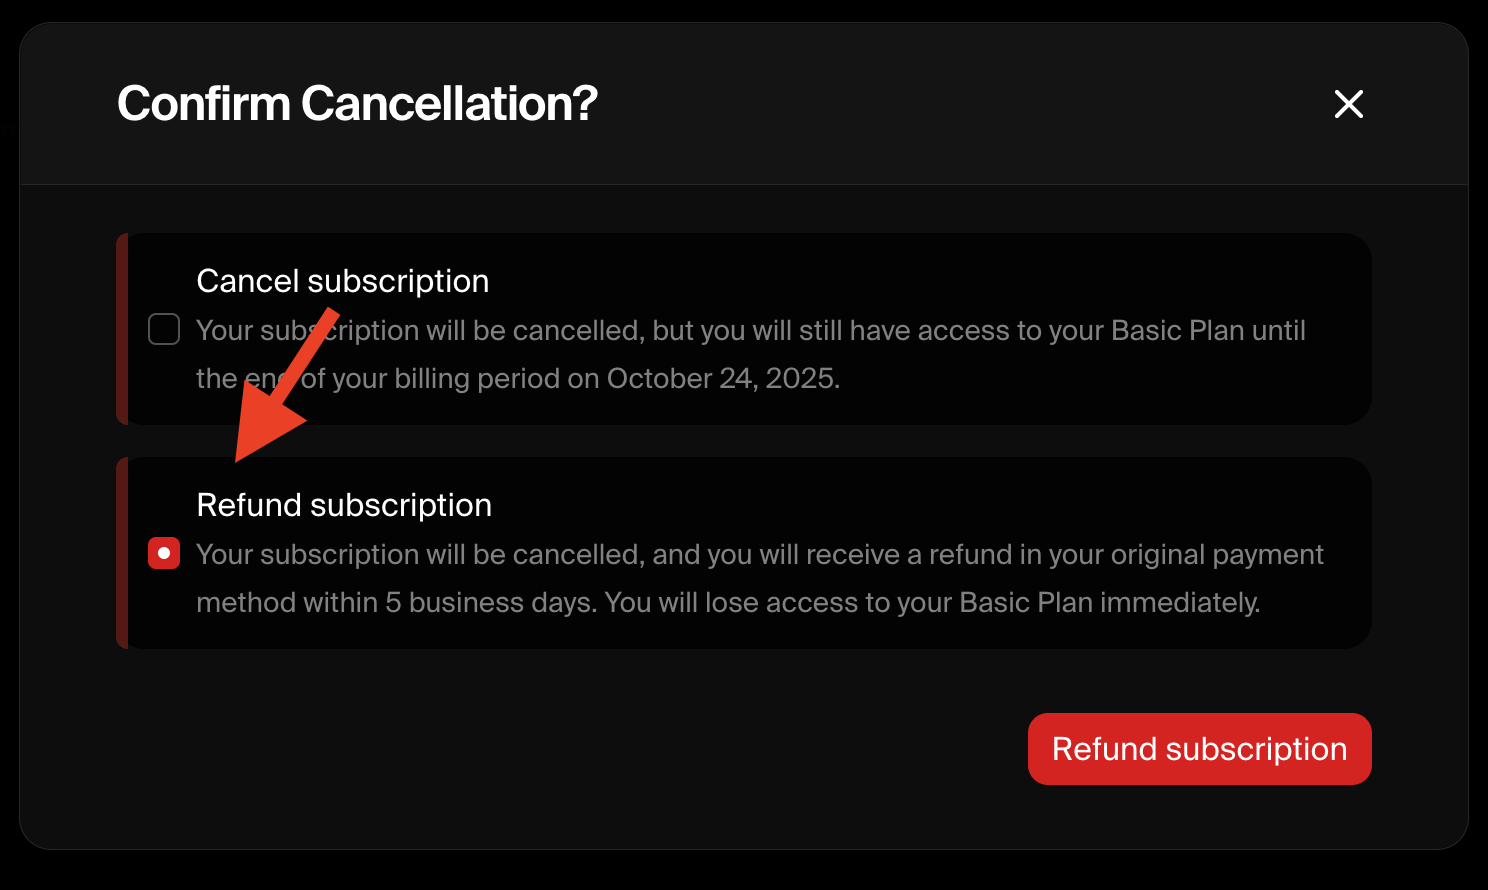
- The system will automatically verify your eligibility
- If eligible, you’ll see an option to refund your subscription. If there is only an option to cancel, you are not eligible for a refund. This is to prevent platform abuse.
Refund Processing Time
- You will receive an email confirmation shortly after requesting a refund
- Refunds typically take 5-10 business days to appear in your account
- The exact timing depends on your payment provider and bank
Common Billing Issues
Failed Payment Attempts
If you’re experiencing failed payment attempts:- Check Card Details
- Verify your card information is correct
- Ensure your card hasn’t expired
- Check that you have sufficient funds
- Contact Your Bank
- Some banks may block international transactions
- Verify that online/recurring payments are enabled
- Try Alternative Payment Method
- If issues persist, try using a different card
- Consider using an alternative payment method
- We support Credit/Debit Cards, Google Pay, US Bank Accounts, Amazon Pay and Cash App Pay
Duplicate or Unexpected Charges
If you see duplicate charges:- Check Your Subscription Status
- Visit your Account Details page
- Verify you don’t have multiple active subscriptions
- This could be due to having a team plan and a personal plan
- Review Recent Transactions
- Sometimes pending charges may appear as duplicates
- Wait 24-48 hours for transactions to settle
- Make sure your past payments went through
- Sometimes payments for past months fail so we attempt to charge your card multiple times
- Monthly plans charge every month, and if a payment fails the month before, that invoice stays outstanding until it’s paid
- If you get charged twice in a month, your payments might’ve been overdue from prior months
Auto-Renewal Information
Important: All paid subscriptions are set to auto-renew by default.- Subscriptions renew on the same date each month
- You will be charged the subscription amount automatically
- To prevent auto-renewal, you must manually cancel your subscription
Frequently Asked Questions
Q: I accidentally subscribed to an annual plan when I only wanted a monthly plan
Currently we don’t support changing an annual plan to a monthly one. But feel free to cancel your annual plan if you’ve used less than 650 compute units and subscribe to a monthly plan instead. Just be sure to hit the monthly toggle on the Pricing page before checking out.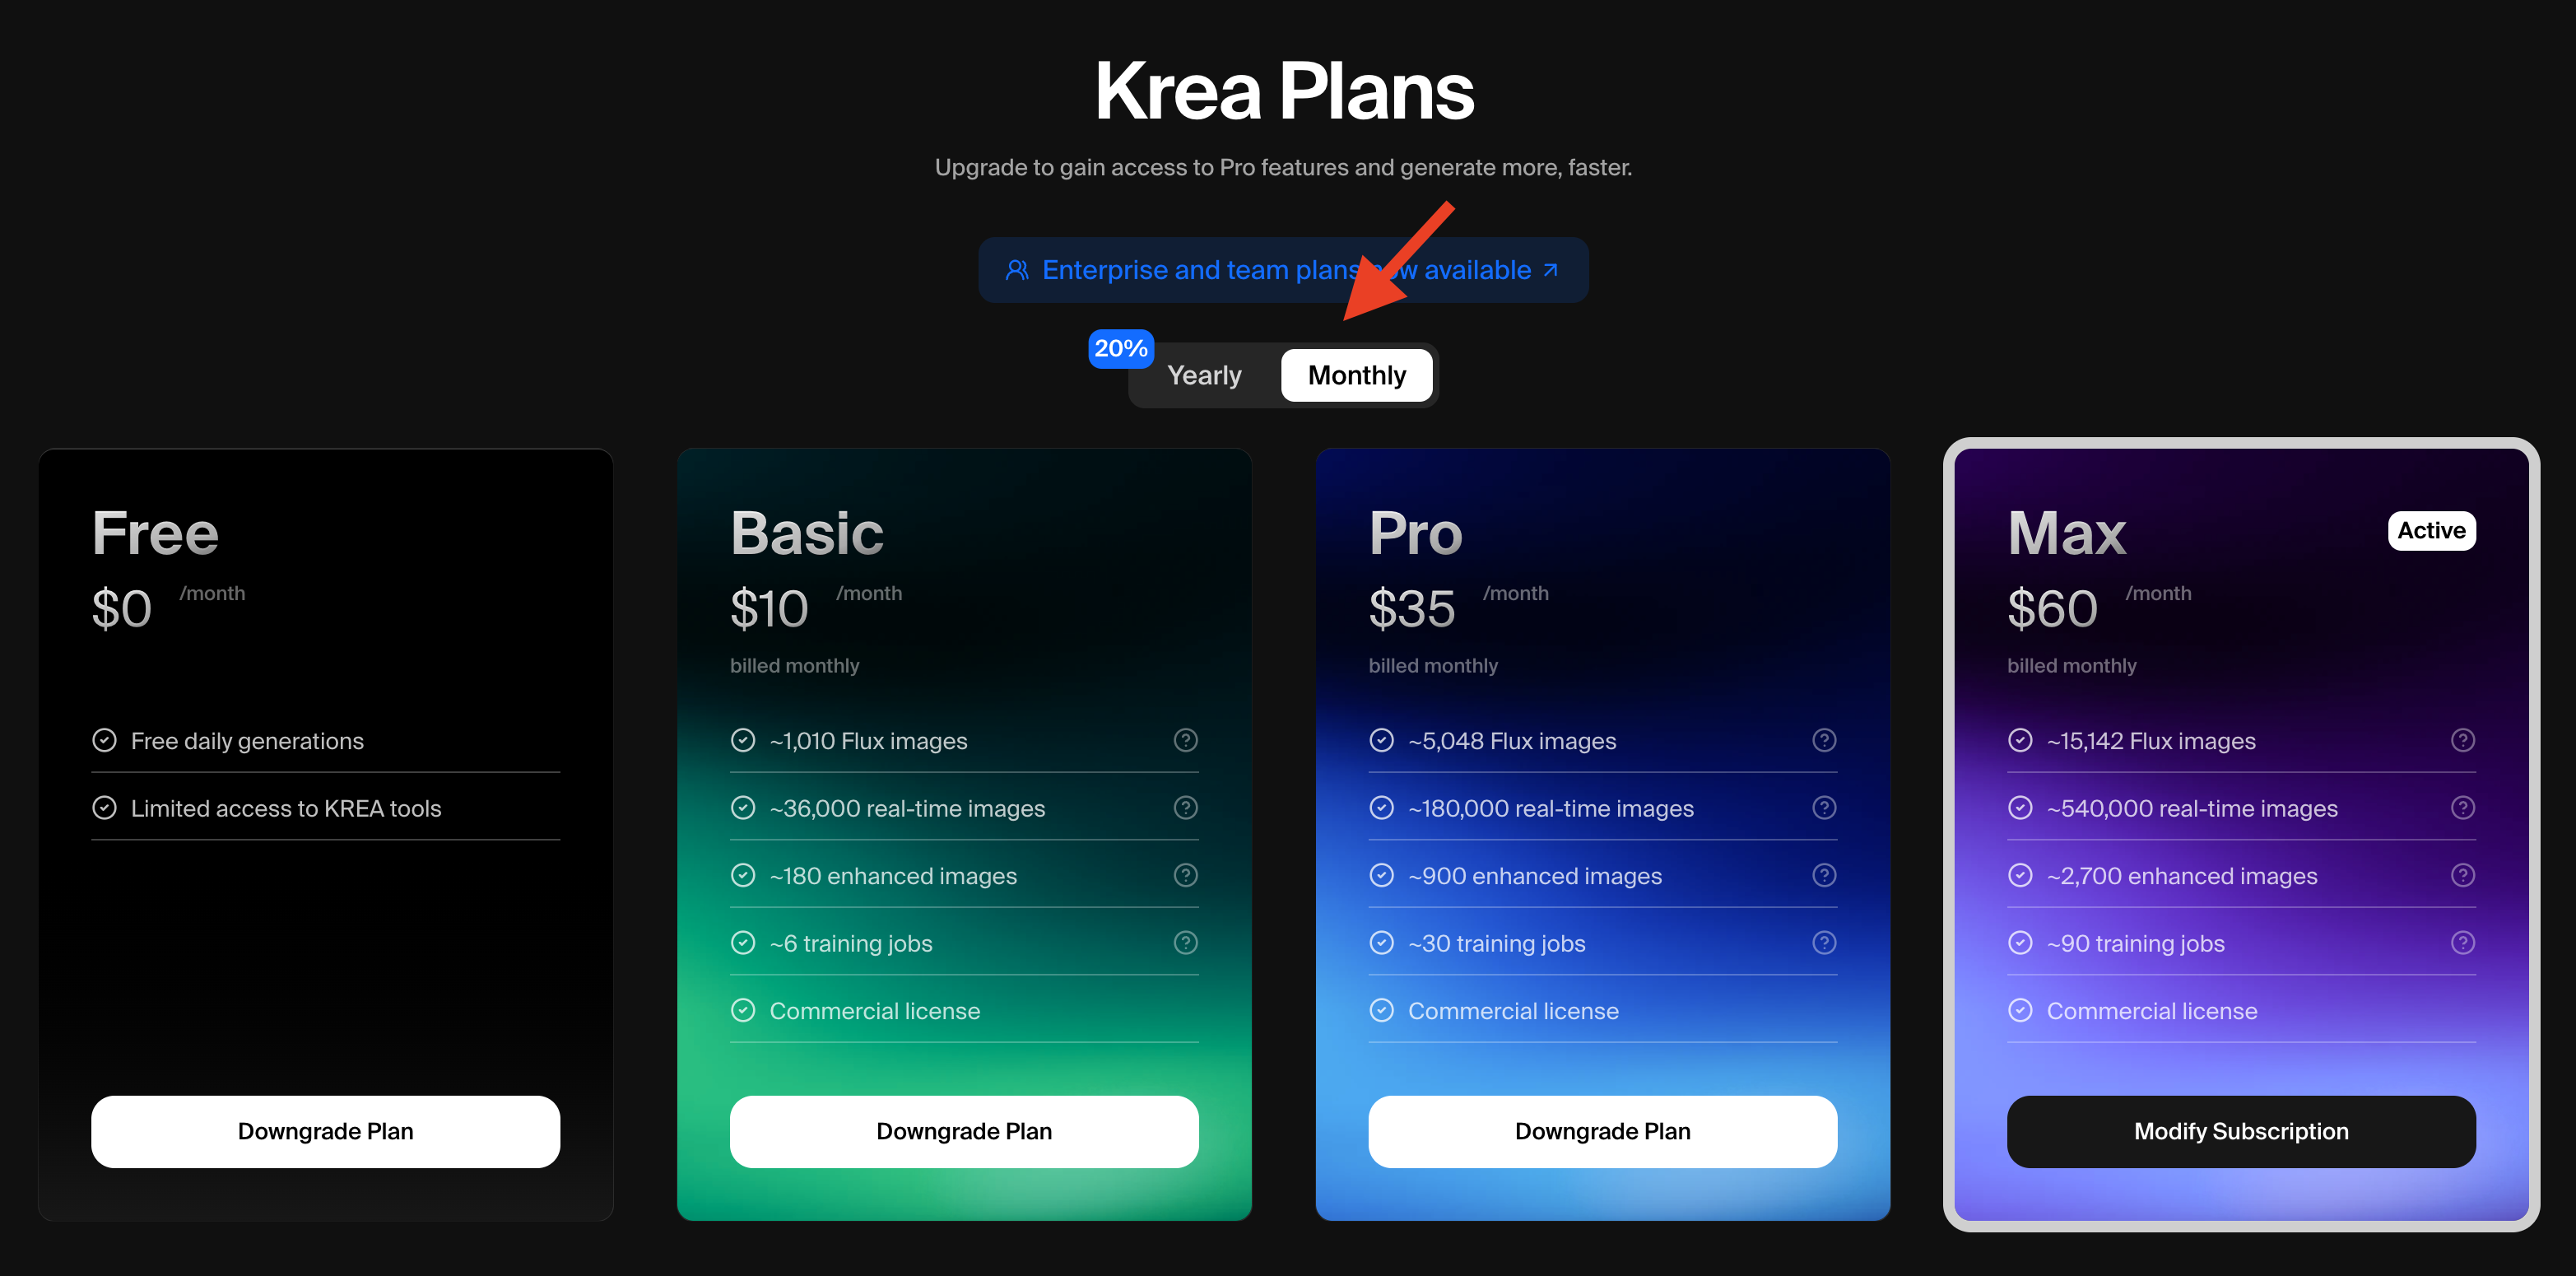
I was charged but can’t access premium features
- Log out and log back in to refresh your account status
- Clear your browser cache
- Ensure you’re using the same email address associated with your subscription
- Sometimes it may take 12-24 hours for your account status change to be reflected in our systems. If it takes longer, reach out to [email protected].
Why was my payment unsuccessful?
Common reasons include:- Insufficient funds
- Expired card
- Bank blocking international transactions
- Incorrect card information
How do I update my payment method?
- Go to your Account Details page
- Navigate to the Billing section
- Click “Update Payment Method”
- Enter your new payment information
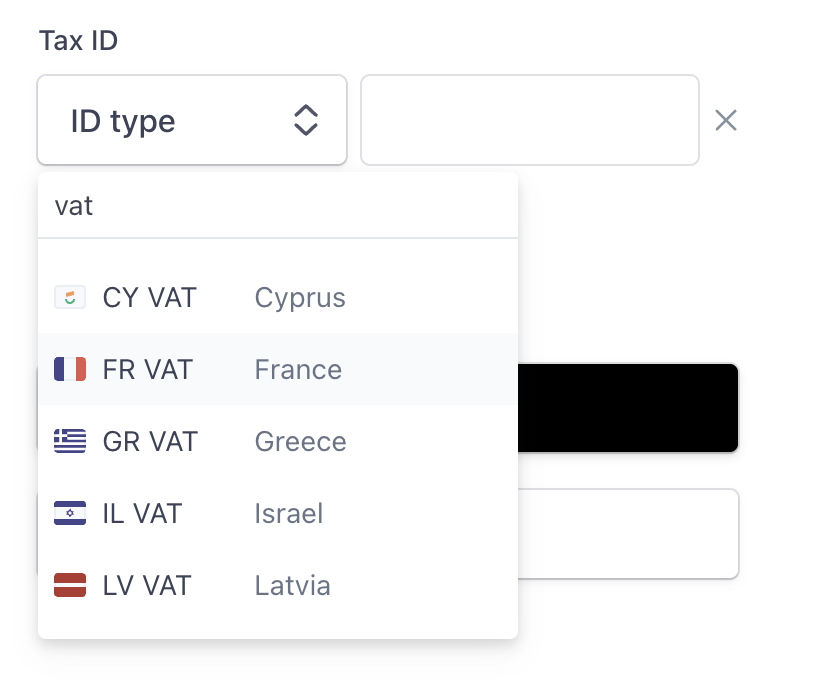
Q: How do I add a VAT number/Tax ID for invoicing?
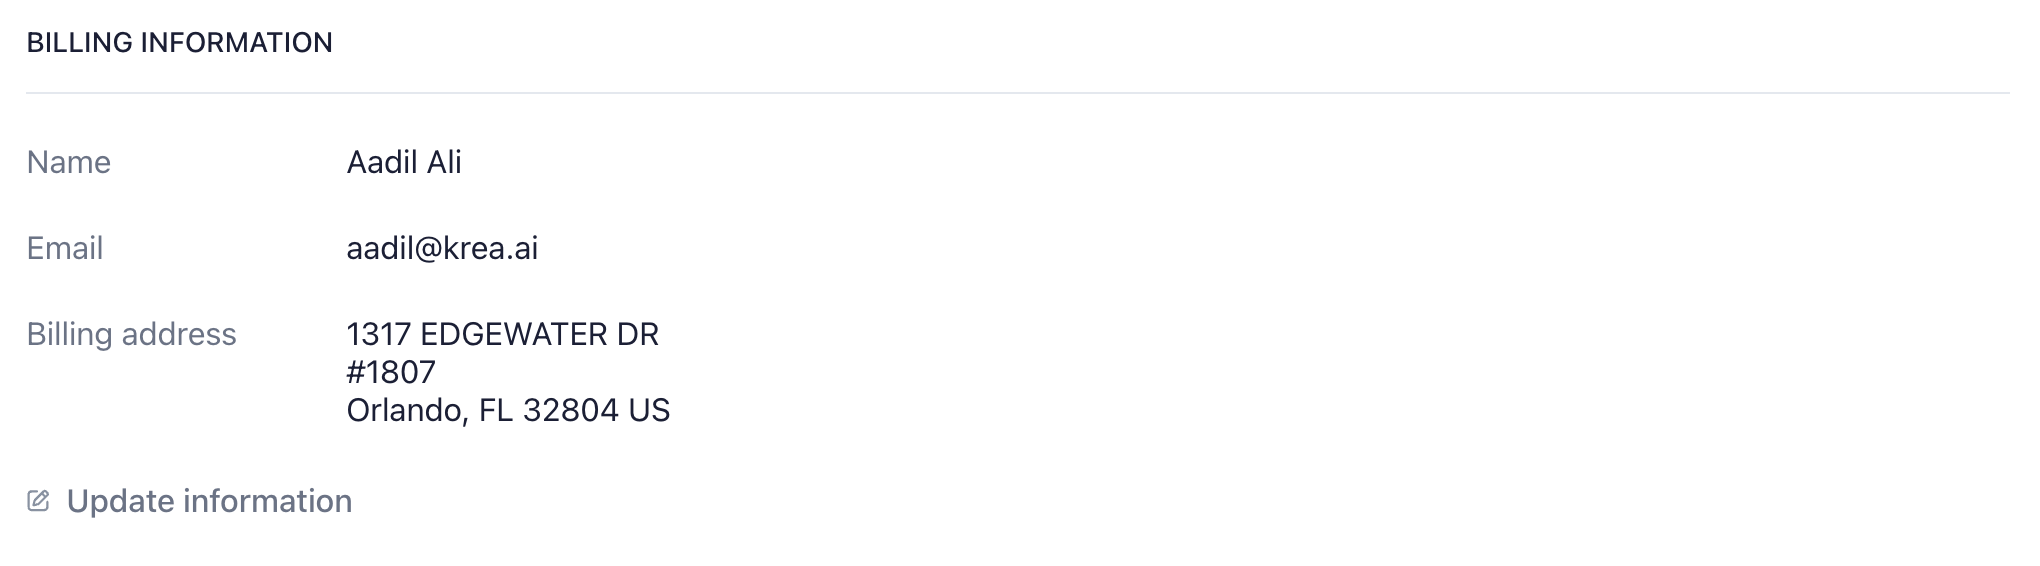
A:- Go to your Account Details page
- Navigate to Stripe by clicking “Update Subscription” or any alternate method
- Once in Stripe, scroll until you see Billing Information, then click “Update Information”
- From there, scroll until you see “Tax ID”, then you should be able to add whatever you need