

Setting rules requires a Business or Enterprise plan. To upgrade, contact sales. On any plan, members can open Access Controls to see what’s blocked for them. If you used Model Access or the controls in Workspace Settings, see What changed.
Open Access Controls
Open Manage ↗ and click Access Controls in the sidebar. Organization owners and admins find it in the organization section. Everyone else finds it in the workspace section. The page has two tabs. Models holds model rules, and Capabilities holds Agent rules. Each tab keeps its own draft and saves on its own.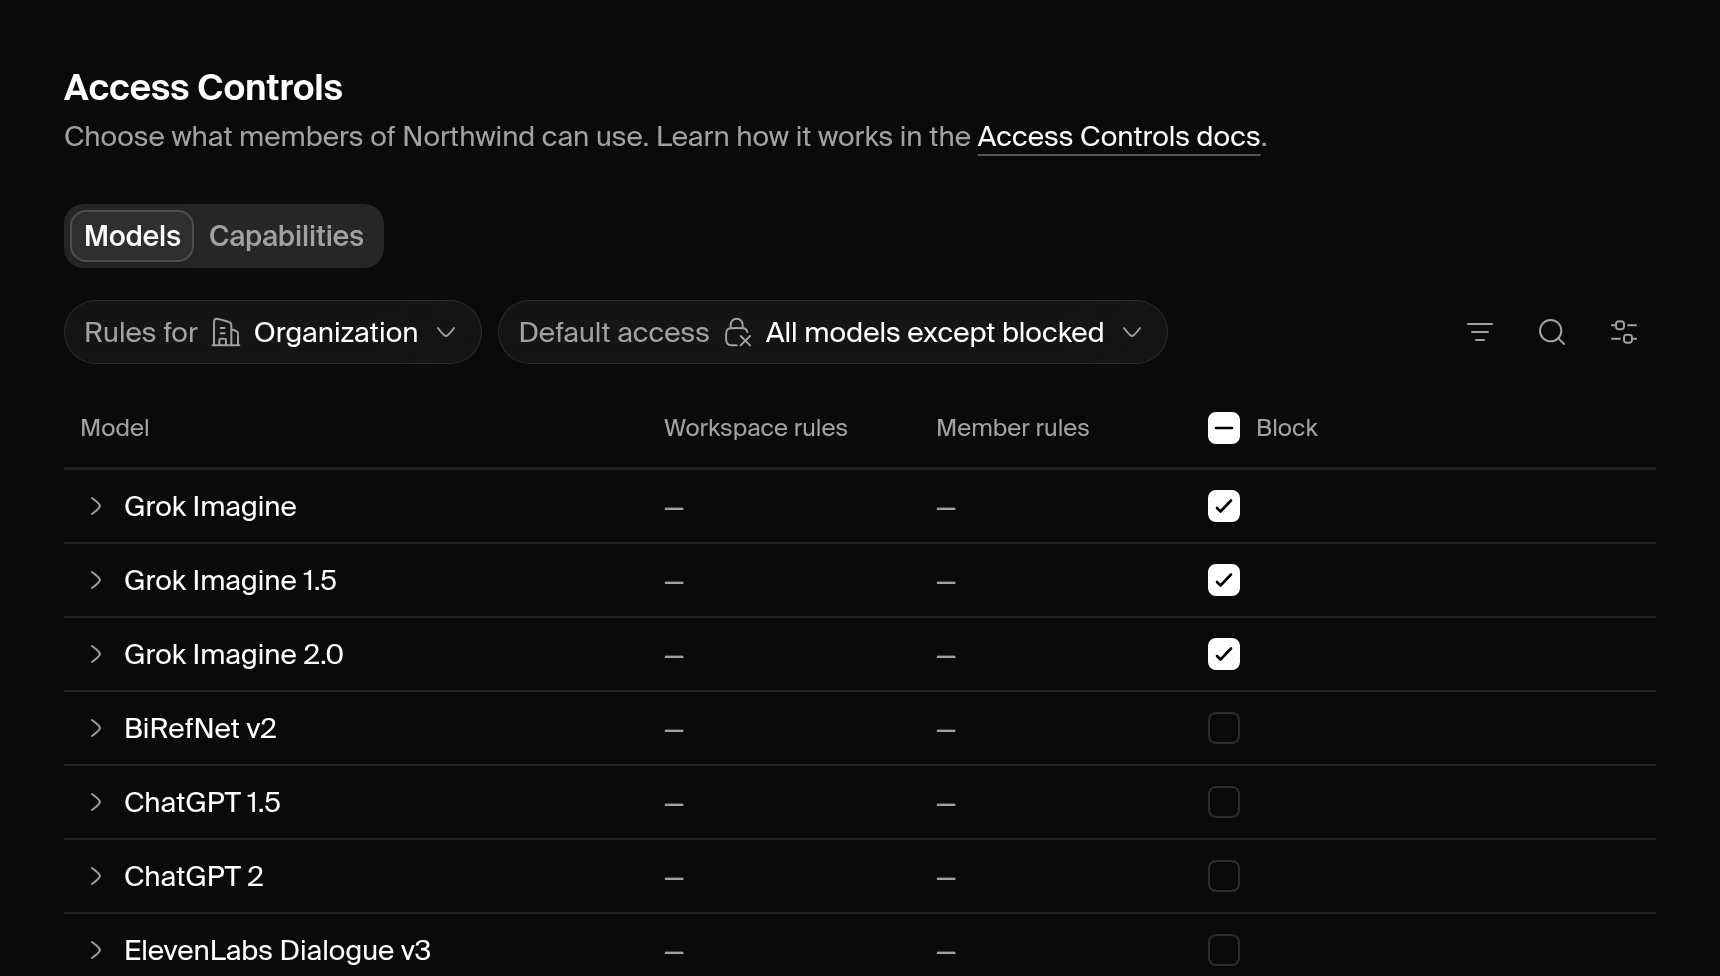 Your role decides what you can see and edit:
How access is decided
An organization has one policy, and each workspace can have its own. The organization policy applies in every workspace in the organization. A model is available to someone only when every policy that applies allows it. In an organization workspace, that means both the organization policy and the workspace policy.Default access
Each policy has a Default access setting: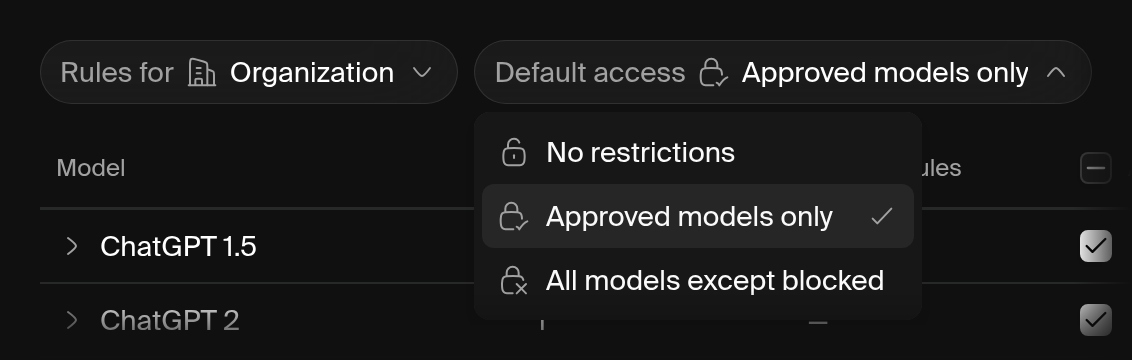
Rules
A rule approves or blocks one model, for everyone the policy covers or for one member. Each rule names an exact model, so models Krea adds later start with no rules. Two things decide the result:- Blocks override. Within a policy, a block for everyone overrides any member approval.
- Every policy must allow the model. An organization block, or a missing organization approval, overrides a workspace approval. The editor disables those approvals and shows Approve it for the organization first.
Edit rules
Changes stay in draft until you save. Discard changes restores the saved rules.1
Choose whose rules to edit
Open Rules for at the top of the table. Organization admins can pick Organization, Workspace, or Member. Workspace admins can pick the workspace or Member.
2
Set default access
Pick a Default access setting. A dialog explains what the change does to existing rules. Switching to All models except blocked removes the policy’s approvals and keeps its blocks.
3
Approve or block models
Check Approve or Block next to each model. The Approve column appears only when Default access is Approved models only.To narrow the list, search, or use Filter to pick a company, provider, or tool. To change every listed model at once, click Edit all N models next to the search field, then choose Approve all, Block all, or Clear all rules.
4
Review and save
Click Review changes to see each changed rule and how access changes for the people it covers. Then click Save all. Krea saves each policy separately.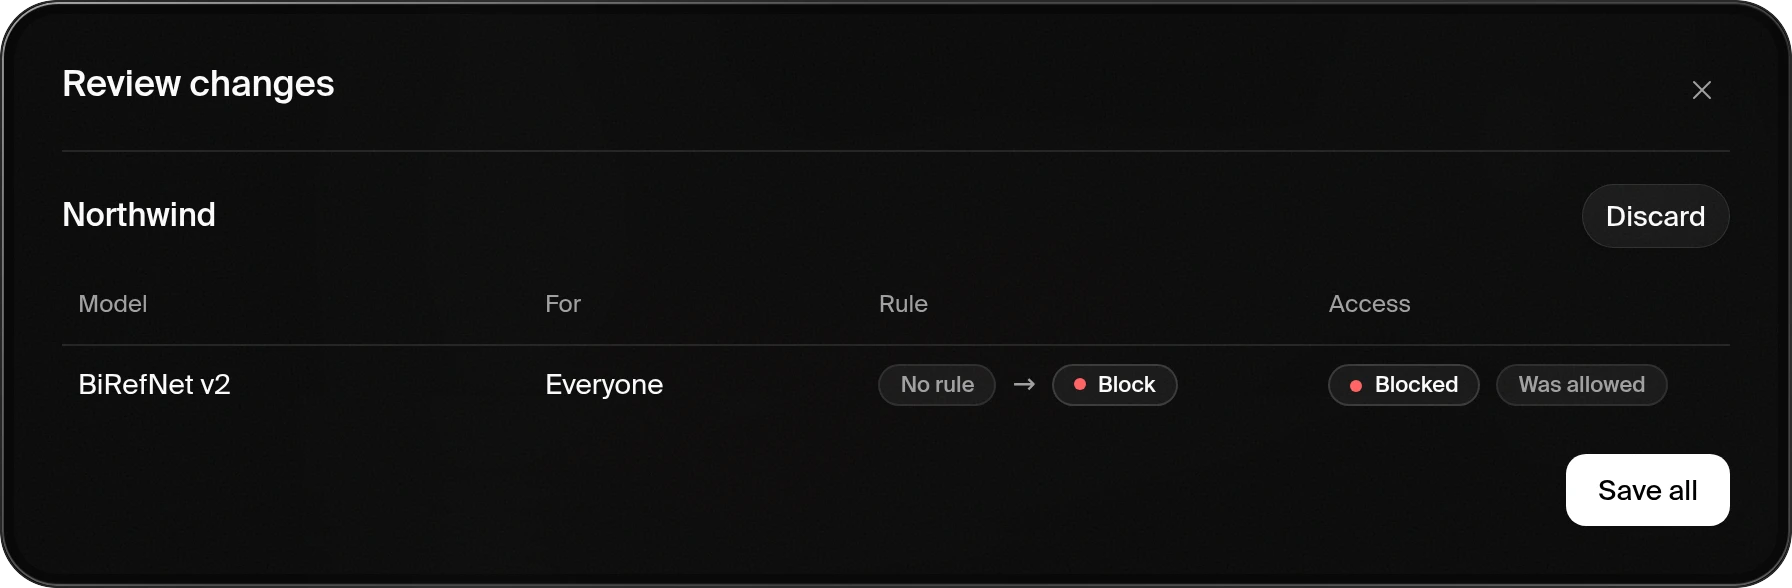
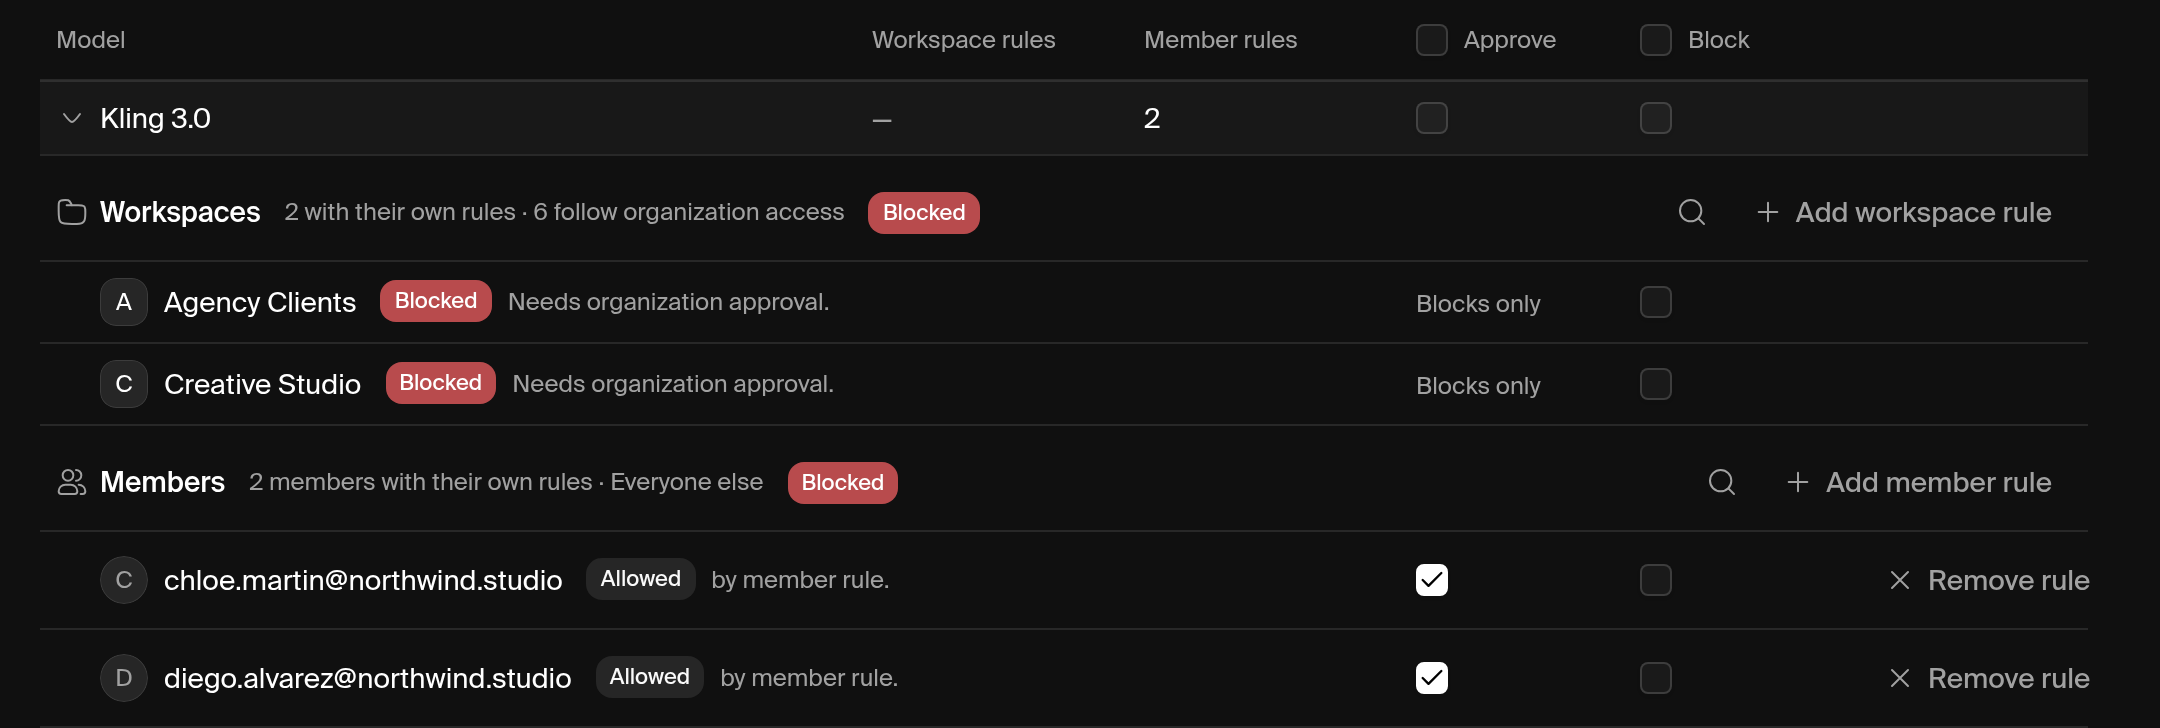
Workspace rules in an organization
Organization admins can give a workspace its own rules. Choose Rules for > Workspace, then pick the workspace. If the workspace follows organization access, Add rules for asks how its rules should work:- All models except blocked: members can use every model the organization allows, except ones blocked for this workspace.
- Approved models only: members can use only models the organization allows and this workspace approves.
Member rules
Choose Rules for > Member, pick the person, and approve or block models for them. In an organization, a member rule that an organization admin sets applies in every workspace of the organization. A member rule that a workspace admin sets applies only in that workspace. You can also open Access Controls from a member’s ⋯ menu on the Members page.Examples
Approve every model from one company
1
Switch to approved models only
Choose Rules for > Organization, then set Default access to Approved models only.
2
Filter by company
Click Filter > Company and pick the company.
3
Approve them all
Click Edit all N models next to the search field and choose Approve all. Then click Review changes and Save all.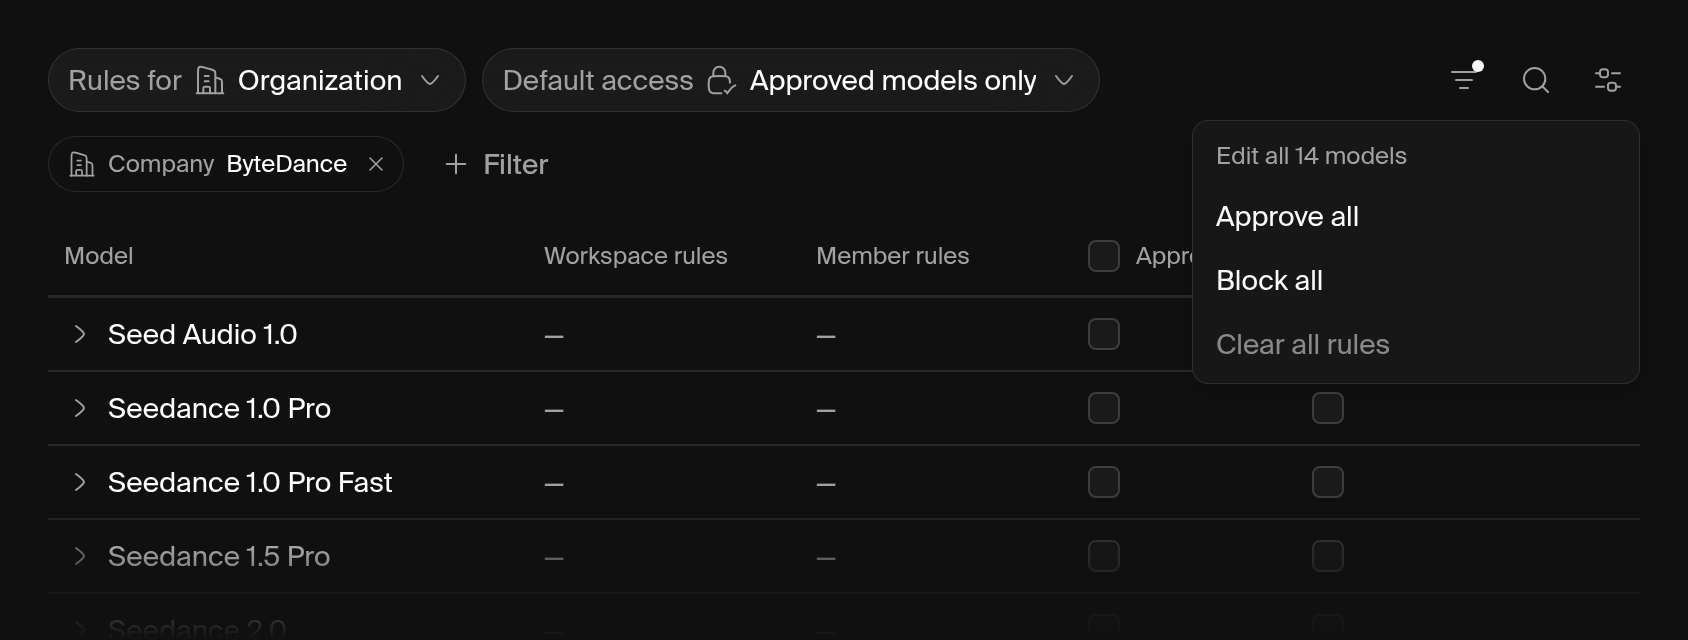
Block one model in one workspace
Choose Rules for > Workspace, pick the workspace, and check Block for the model. If the workspace was following organization access, it switches to All models except blocked with that one block.Let a few people try a model
Set Default access to Approved models only and leave the model unapproved. Then choose Rules for > Member and approve it for each tester. A block for everyone would also block your testers, so this only works under Approved models only.Block a model for one person
Choose Rules for > Member, pick the person, and check Block for the model.Agent
The Capabilities tab controls who can use Krea Agent. Agent rules work like model rules, with Allow in place of Approve. Choose whose rules to edit under Rules for, set Default access, then allow or block Agent. An organization block overrides a workspace allow.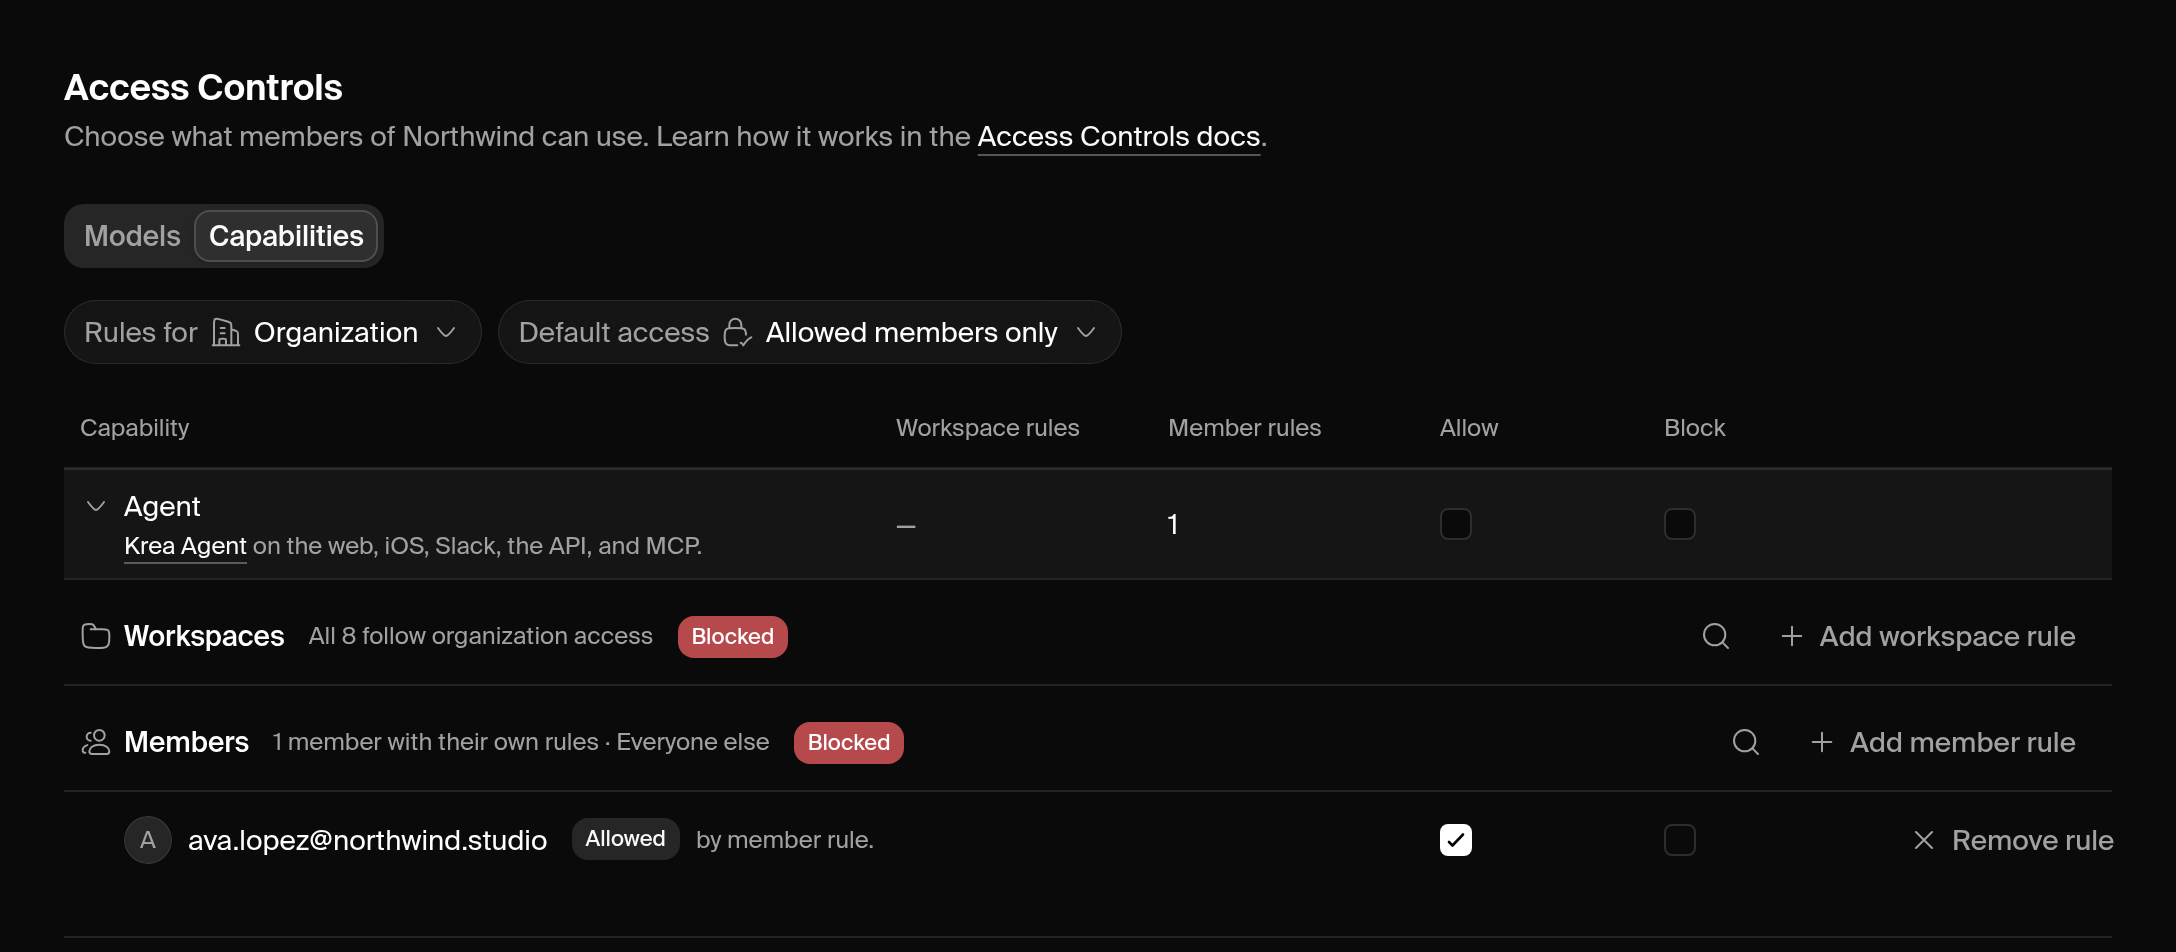
Where Agent rules apply
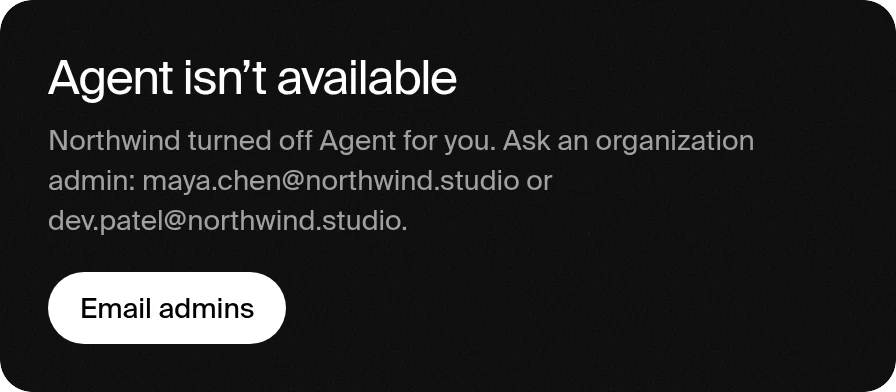
A block covers Agent on the web, in the iOS app, in Slack, and through the Krea API and the Krea MCP server. Ad Studio chat, 3D Studio, and the Nodes agent run on Agent, so the block covers them too. Each session follows the rules of the workspace it belongs to. Switching to another workspace doesn’t reopen sessions from a workspace where you’re blocked. When Agent is blocked for someone:- The Agent page shows Agent isn’t available, with the admins to email.
- API and MCP requests return HTTP 403.
- In Slack, Agent replies in the thread that an admin turned it off.
- Their routines turn off at the next scheduled run, and stay off until they turn them back on.
- Their past sessions are kept. They can open them again once an admin allows Agent.
Let a few people use Agent
Choose Rules for > Organization and set Default access to Allowed members only. Then expand the Agent row, click Add member rule for each person, and check Allow. Click Review changes and Save all.Turn off Agent in one workspace
Choose Rules for > Workspace, pick the workspace, and check Block next to Agent.What members see
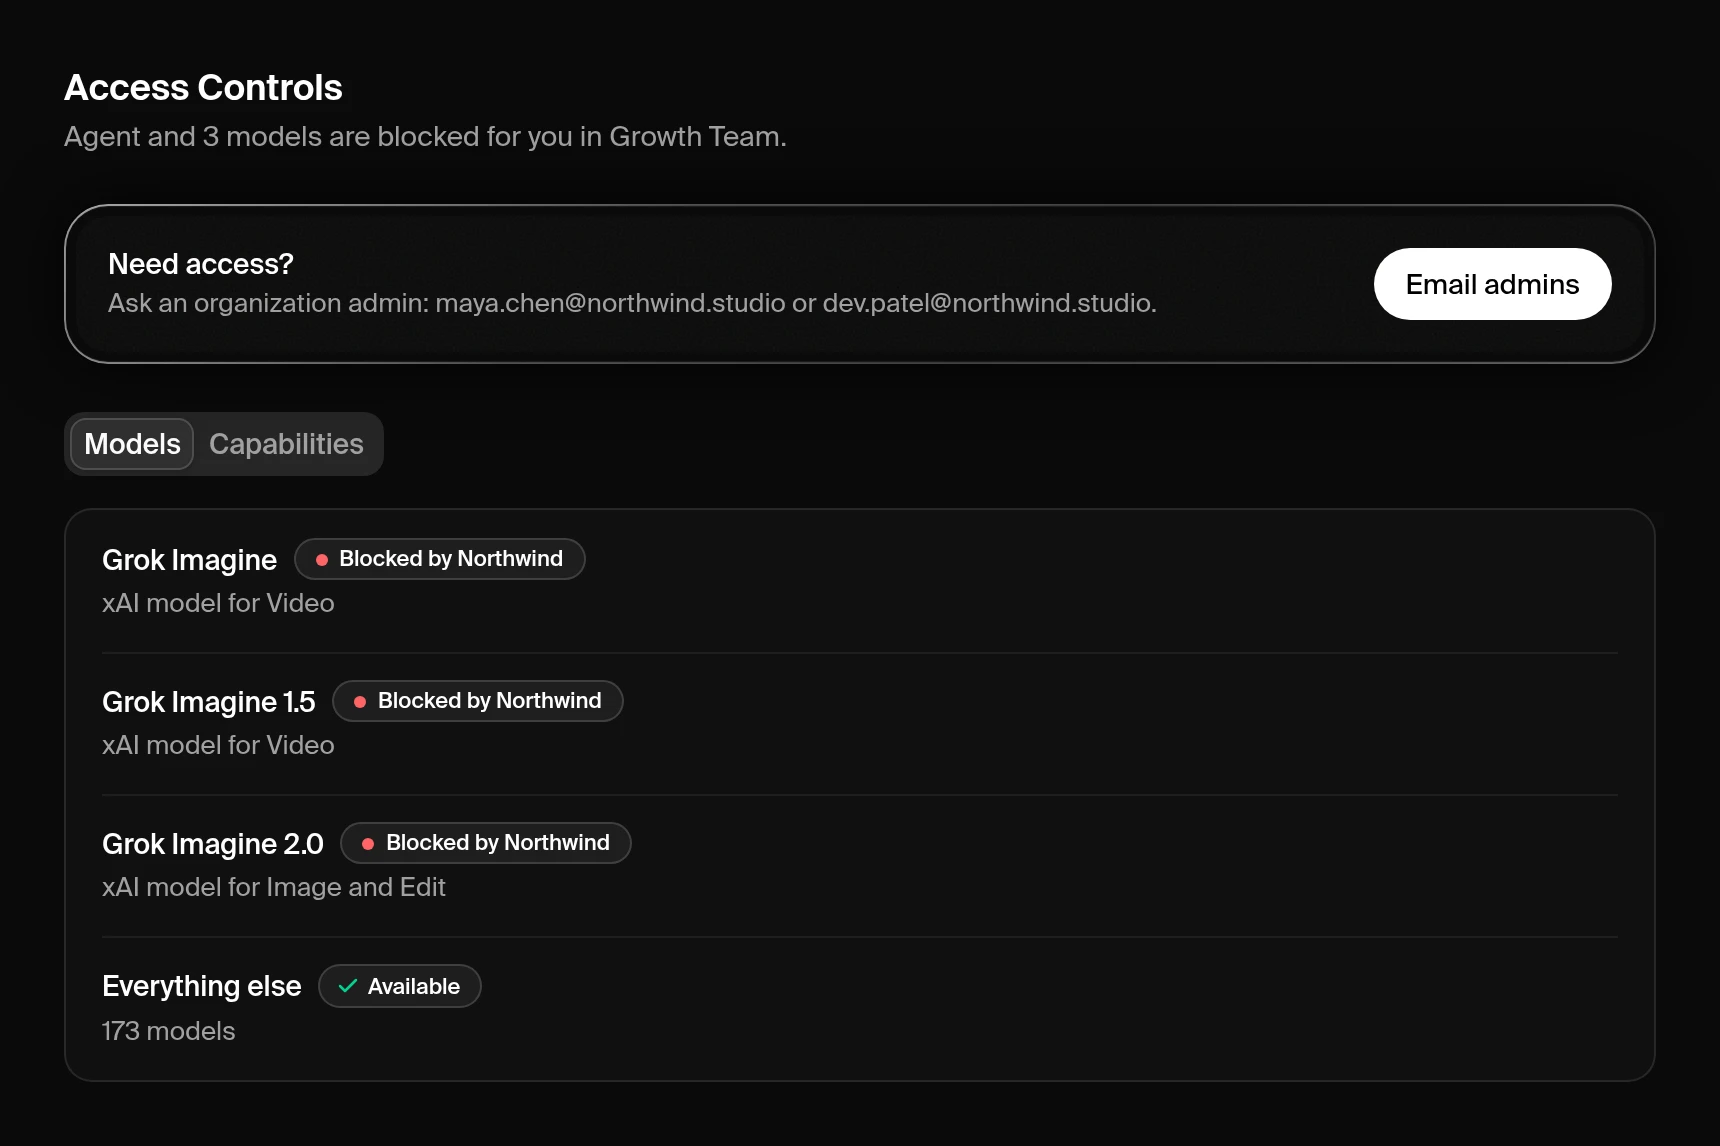
Model pickers dim blocked models, and compact pickers group them under Restricted by your admins with a lock icon. Auto skips them. Picking a blocked model opens a dialog with up to three admins to contact and, when one exists, a suggested alternative. Admins who can change the rule see a Manage Access Controls button in place of the contact list.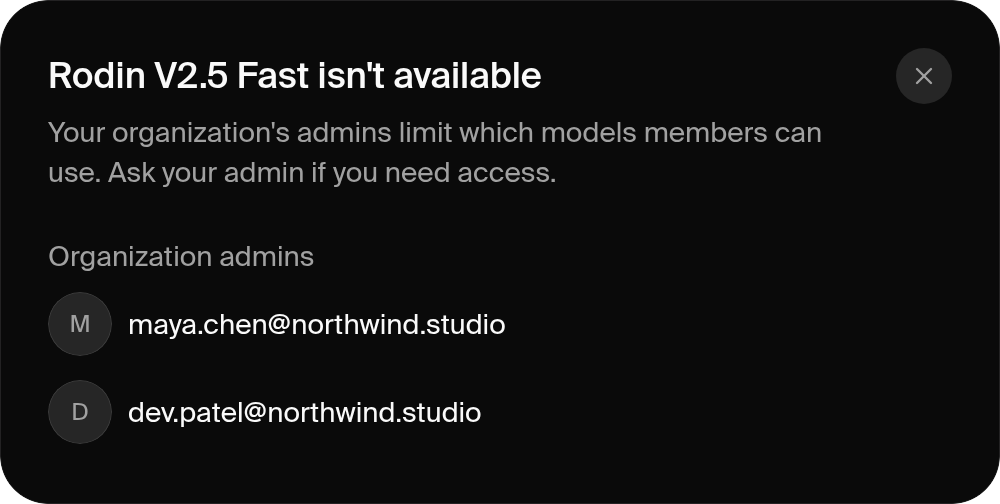 A member’s Access Controls page lists only what is blocked for them in the active workspace. Each blocked model or capability says whether the organization or the workspace blocked it. The Need access? card names the admins who can change those rules, with a button to email them.
Where rules apply
Krea checks model access when each generation starts, in every tool and through the Krea API and the Krea MCP server. Blocked API and MCP requests return HTTP 403 withFEATURE_RESTRICTED. Realtime checks on connect, then about once a minute. For Agent, see Where Agent rules apply.
Plan changes
Downgrading to a plan without Access Controls pauses enforcement. Krea keeps the rules and applies them again when you upgrade.What changed
Model Access is now called Access Controls, and its page moved to Manage > Access Controls. Old Model Access links still work and open the new page. Model rules didn’t change. Before Model Access, model rules lived in Workspace Settings. Every workspace’s rules carried over from there, and every blocked model stayed blocked.Troubleshooting
Why is this model blocked?
Why is this model blocked?
Click the model’s row in the editor. The expanded row shows the result for each workspace and member, and the rule that decided it. Members can see who blocked it on their own Access Controls page.
I approved a model, but a member still can't use it
I approved a model, but a member still can't use it
Another rule blocks it. Blocks override approvals, so look for a block that applies to everyone or to that member. In an organization, also check that the organization allows the model.
The Approve checkbox is missing or disabled
The Approve checkbox is missing or disabled
The Approve column appears only when the policy uses Approved models only. A workspace approval is disabled when the organization blocks the model or hasn’t approved it. Approve it for the organization first.
I switched to Approved models only and everything is blocked
I switched to Approved models only and everything is blocked
The policy has no approvals yet. Approve the models you want, or click Discard changes if you haven’t saved. See Approve every model from one company.
New models keep appearing as available
New models keep appearing as available
The policy uses All models except blocked, which makes new models available right away. Switch to Approved models only if you want to approve each new model first.
I can't change the Organization column
I can't change the Organization column
Only organization owners and admins can edit organization rules. Ask one of them to make the change.
The editor says a policy changed since I loaded it
The editor says a policy changed since I loaded it
Another admin saved that policy while you were editing it, and Krea loaded their version. Make your changes again and save.
Auto has no models available
Auto has no models available
Every model Auto could use is blocked for you. Pick a model yourself, or ask an admin for access.
I switched Agent to Allowed members only and lost access myself
I switched Agent to Allowed members only and lost access myself
Allowed members only blocks everyone without an allow rule, including admins. Open Access Controls > Capabilities, expand Agent, and allow yourself. Admins can always open Access Controls, even when Agent is blocked for them.
Where did Model Access go?
Where did Model Access go?
It’s now called Access Controls. Your model rules are on its Models tab, and old Model Access links open the new page. See What changed.
Where did the controls in Workspace Settings go?
Where did the controls in Workspace Settings go?
They moved to Access Controls. See What changed.
Need help?
Enterprise support
Email our enterprise support team at support@krea.ai.
Sales team
Ask about Business or Enterprise plans at sales@krea.ai.