
Krea Edit now supports annotations. Mark up multiple regions of an image, write a separate prompt for each one, and generate all the changes in a single pass.
Editing an image region by region used to mean working through them sequentially. Select an area, describe the change, generate, wait for the result, then move to the next one. Five things to fix meant five separate rounds.
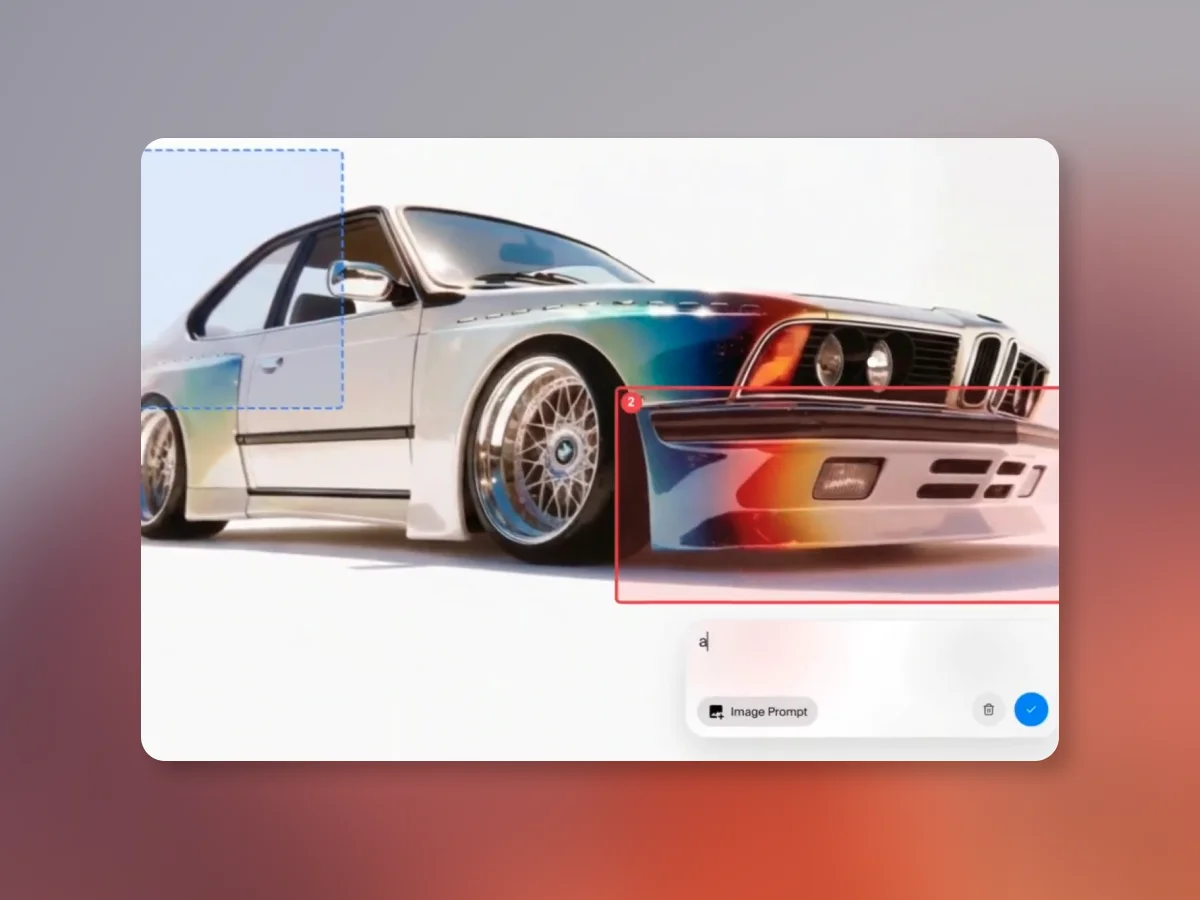
With annotations, you mark up everything first, then generate once. Draw rectangles around every area that needs work, write what you want for each one, and the model processes all regions together.
How it works
Open an image in Krea Edit and start drawing rectangles on the canvas. Each region gets a numbered badge in its own color so you can tell them apart. A card appears anchored below each rectangle where you type your prompt.
You can describe something completely different for each region. Swap a background in one, change an outfit in another, add an object somewhere else. Each prompt is independent.
Annotations can also carry reference images. If you want a region to match a particular look, drop the reference right into that region’s card. Upload from your files or pick from your existing assets. The model uses it as a visual guide for that area only.
The sidebar lists every annotation with its color badge and prompt text. Click any entry to jump to that region on the canvas.
One pass
When you generate, the model handles each prompt on its own while keeping untouched areas intact. One generation, all your edits.
For single changes, the brush and selection tools work the same as before. Annotations are for when you look at an image and see three or four things to fix at once.