The thing nobody tells you about running a small architecture studio: most of the work is not architecture. It is pitching — taking an idea from a one-line brief through enough images to win the project, and then through enough images to keep the client aligned all the way to completion.
Krea 2 covers that entire arc in a single tool. This article walks through one hypothetical project — a contemporary hillside coastal house — from the first sketch to the client board, with every image in this article generated for that project.
The project: hillside coastal house
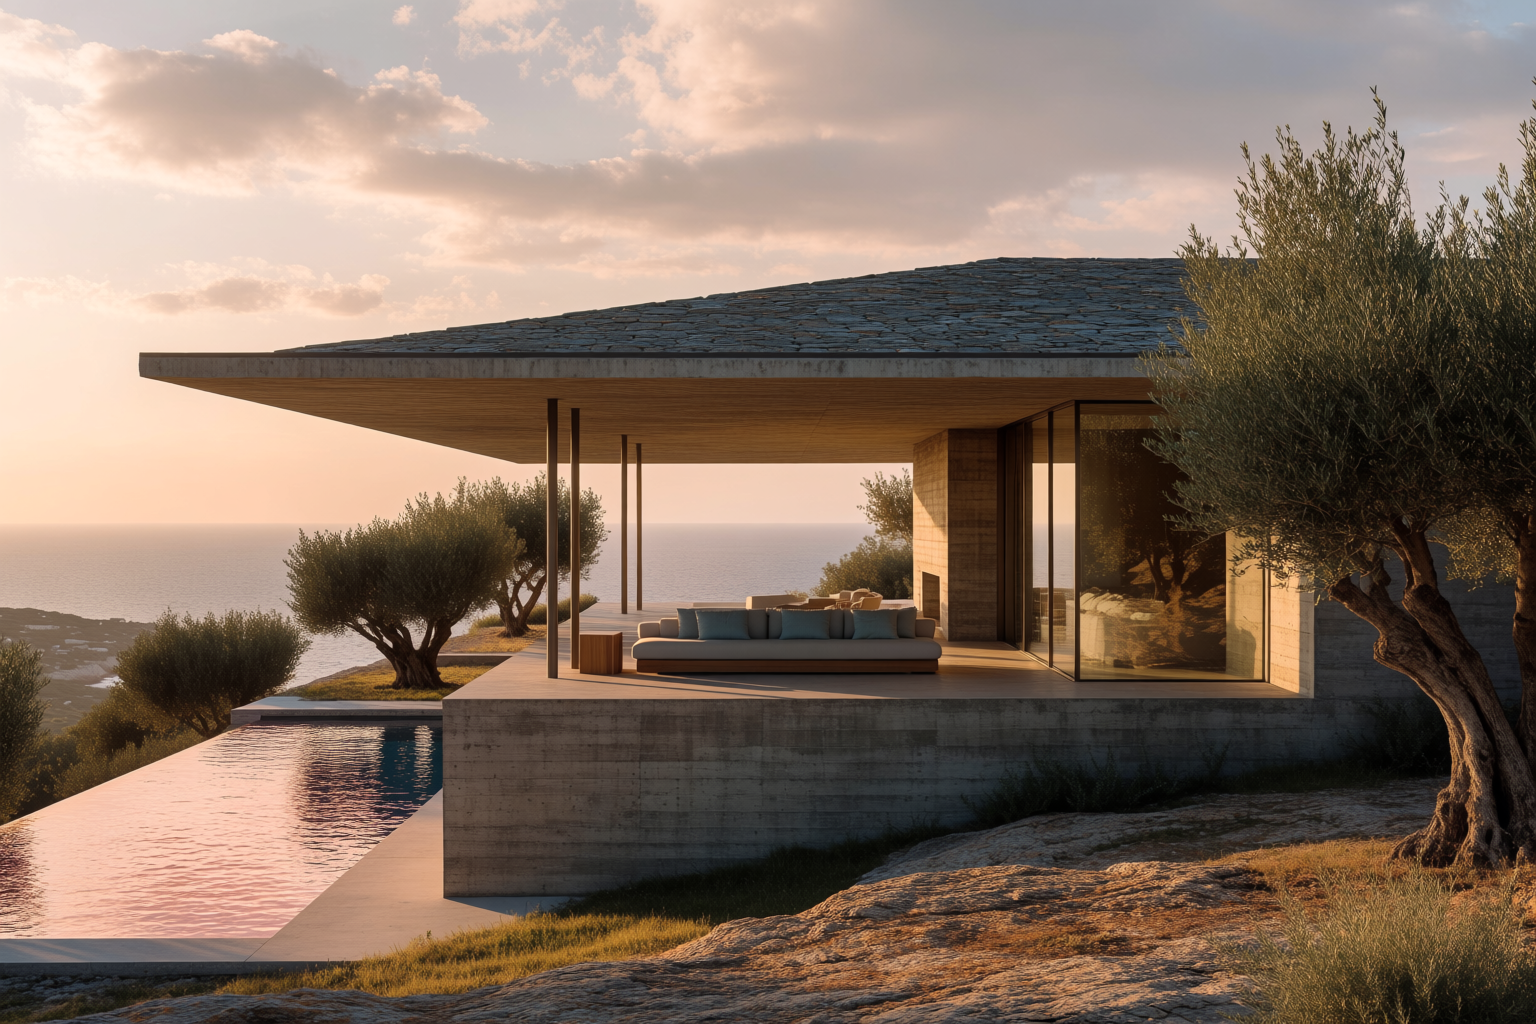
A 3,200 sq ft single-family home on a Pacific coast slope. Three bedrooms, an infinity pool, an indoor-outdoor living program. Budget: enough to use real materials but not enough for fully bespoke fabrication. Client: a creative-professional couple with strong opinions about architecture.
We will take this project from a paper-napkin sketch to a client board in eight images.
Phase 1 — Concept sketch
The first deliverable. A hand sketch of the building’s organising idea — a low-slung volume cascading down the slope, with the pool capturing the ocean view.

In a traditional workflow, this is where the architect spends a week between sketch and the first proposal image. In a Krea 2 workflow, this is the input.
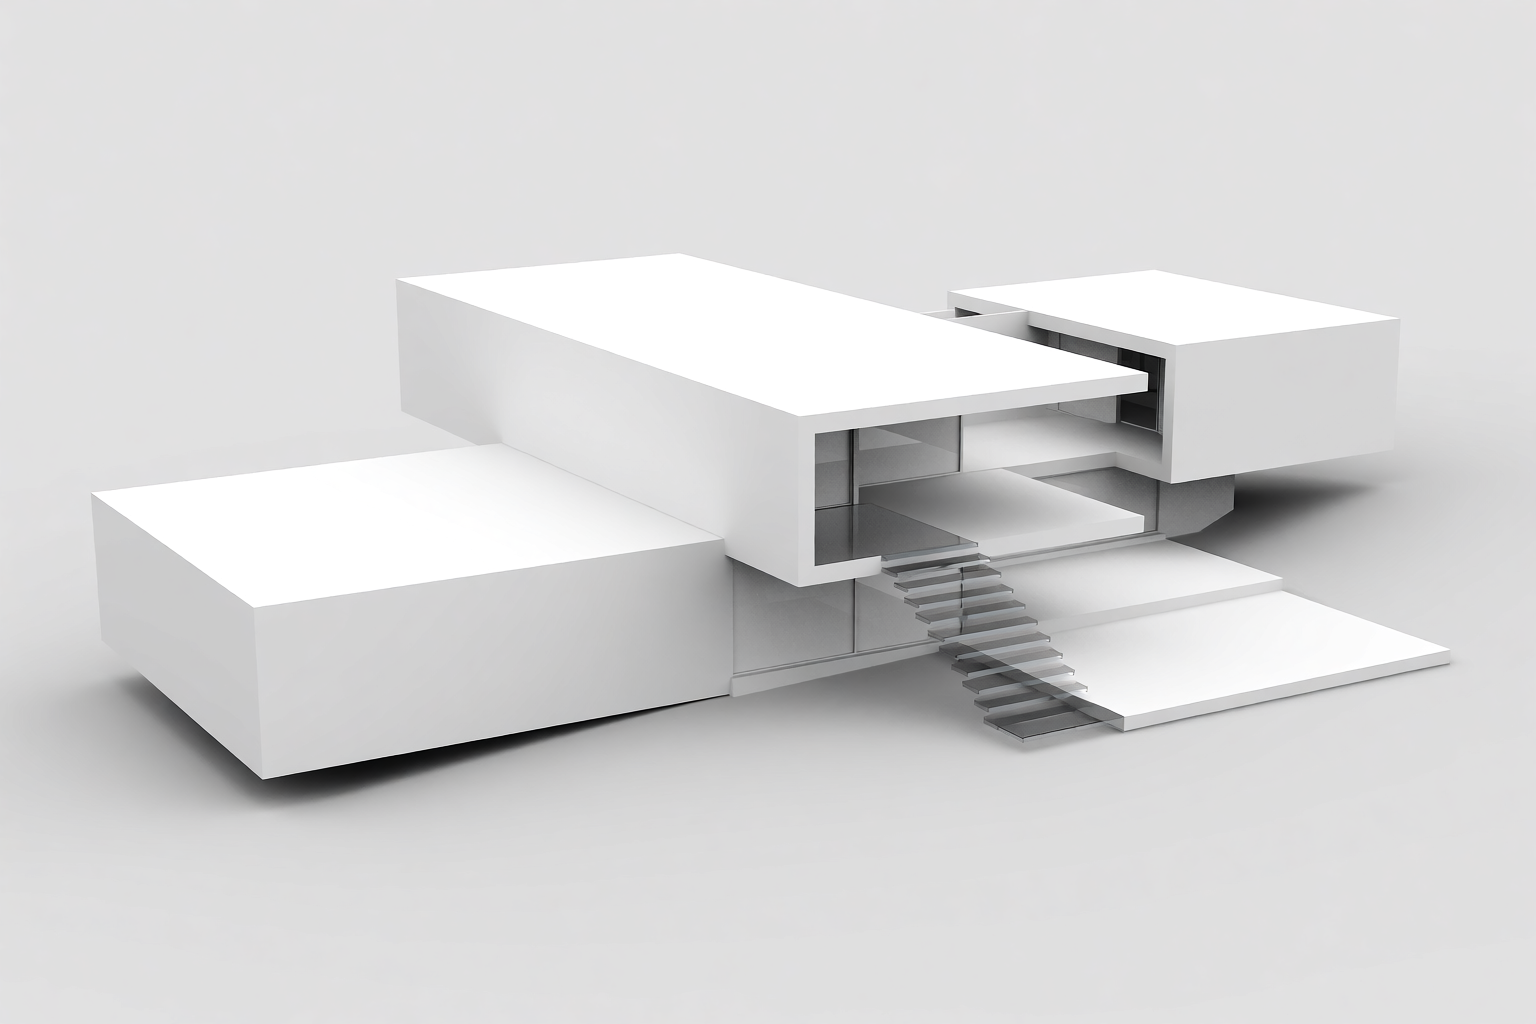
Phase 2 — Massing study
The next conversation: form and scale. The sketch becomes three cantilevered volumes stepping down the slope. The massing study is a model-photography render at the abstraction level of a wood study model.
The client looks at this and decides: yes, three volumes is right; the middle volume should be the public/social one.
Phase 3 — Site context
Now we place the design in its actual location — the Pacific coast slope, the town below, the neighbouring vegetation. The site context render answers the question every coastal client asks: how does this look from the road?
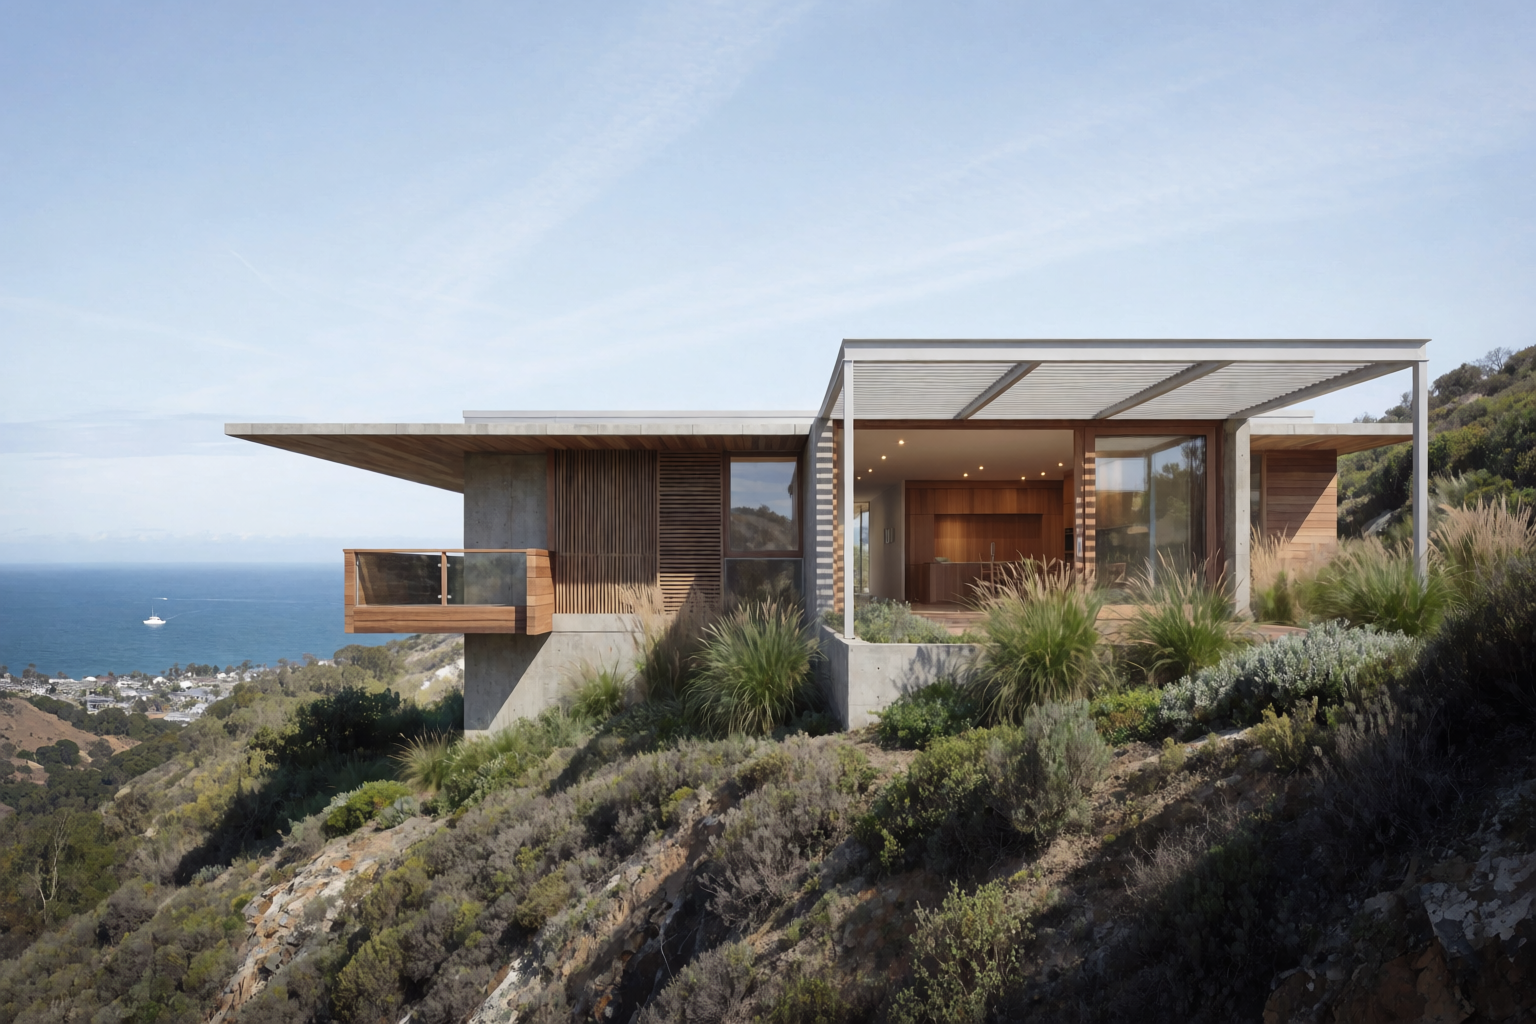
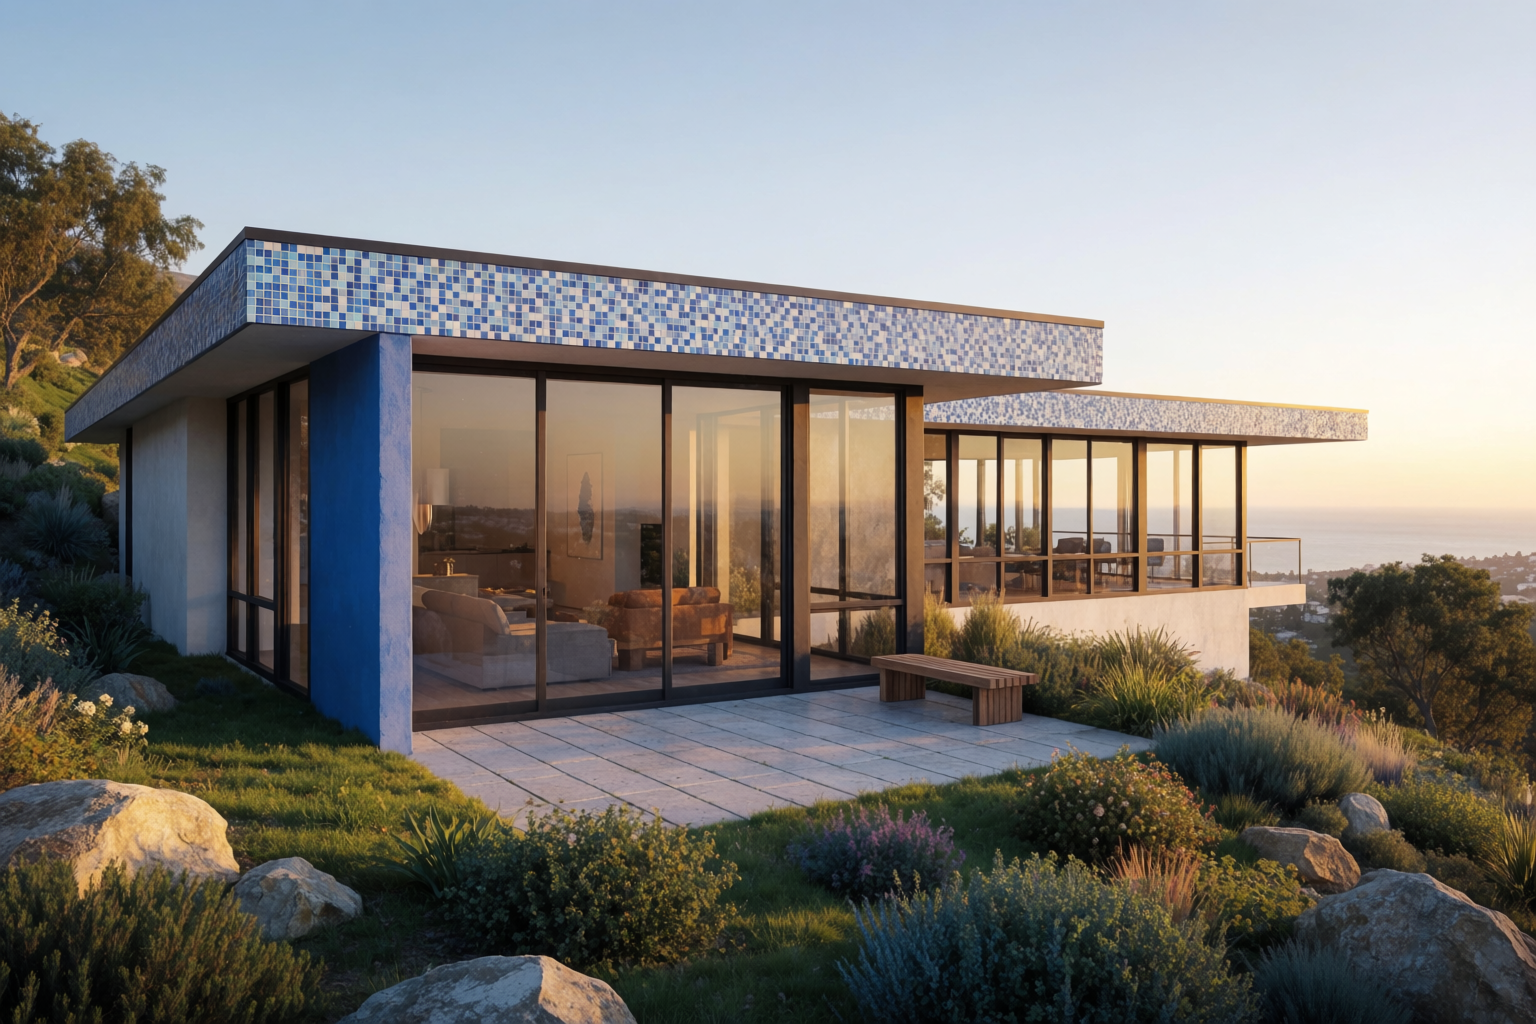
Phase 4 — Exterior hero render
The hero. The image the client will frame and put on their wall. Golden hour, infinity pool, warm timber and concrete. This is the render that wins the project.
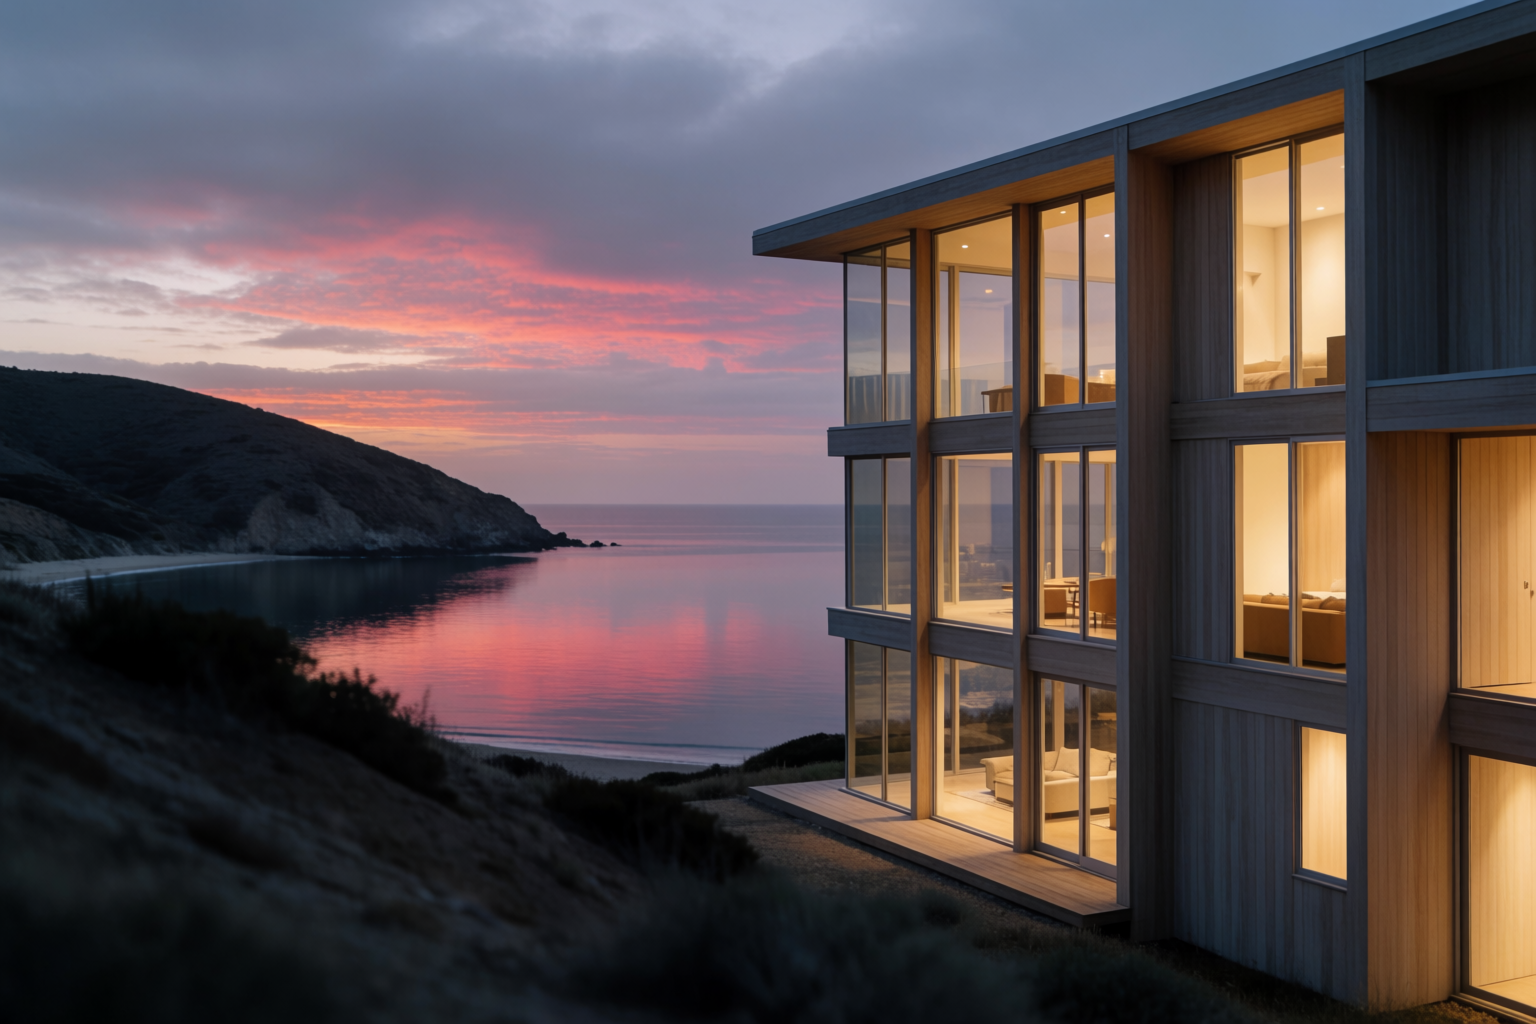
Phase 5 — Night render
Architectural visualization always needs the night shot. It sells the lighting design, the indoor-outdoor relationship, and the way the house lives after the sun goes down.
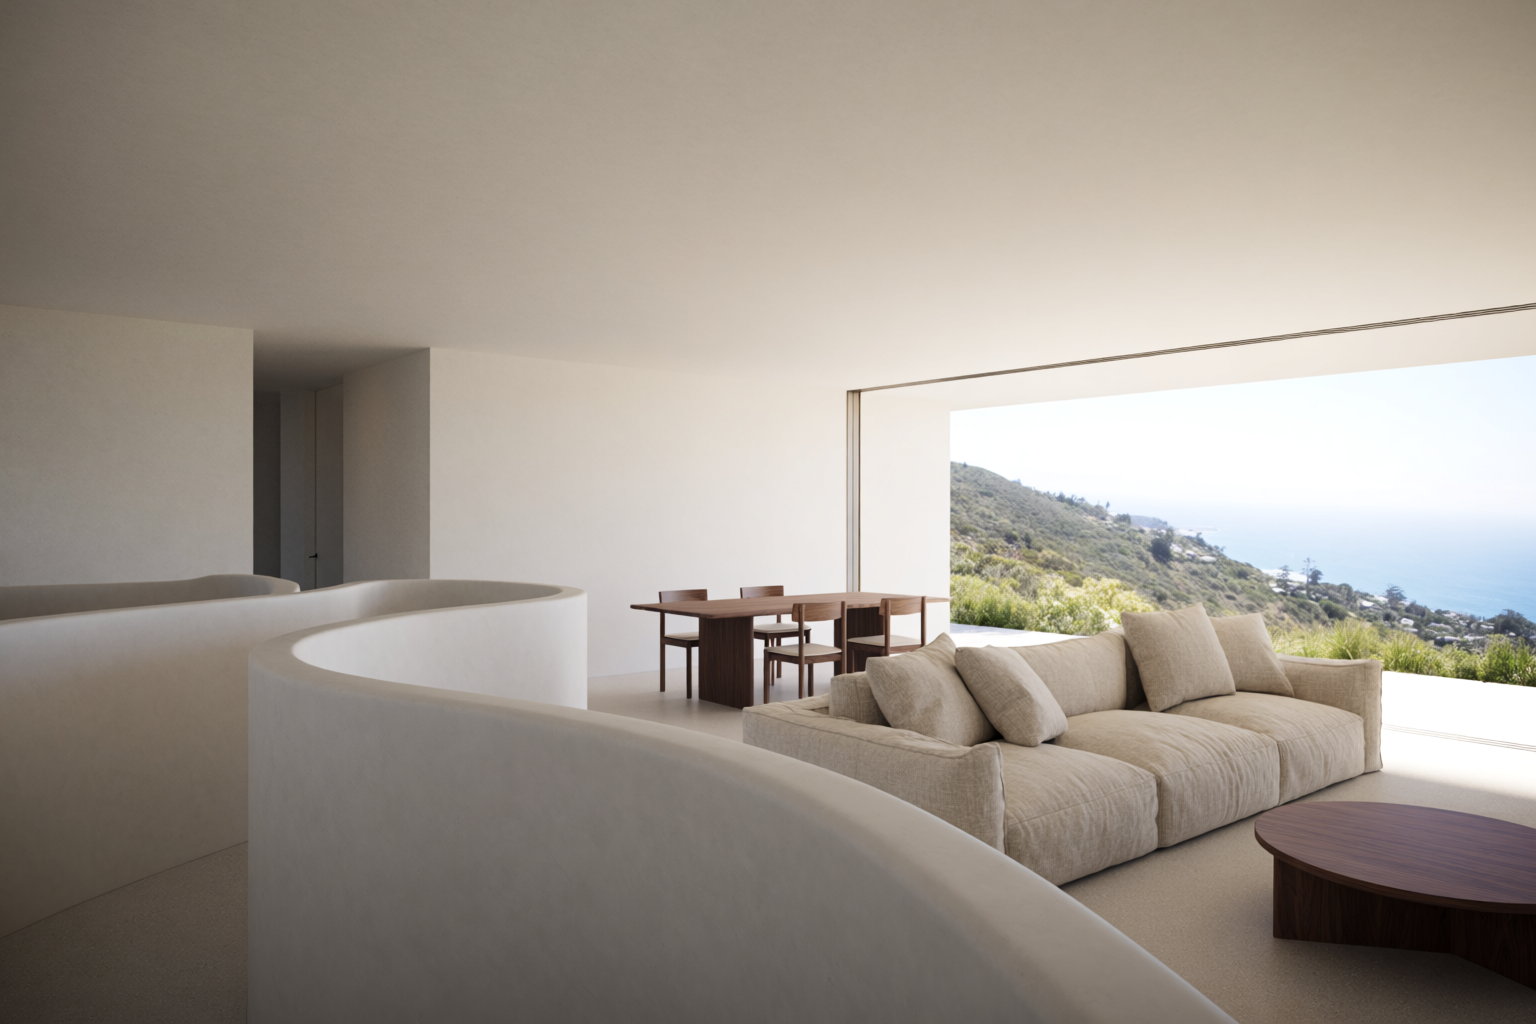
Phase 6 — Interior, living room
Now we move inside. The same project, the open-plan living room, floor-to-ceiling glass opening to the ocean view. Material spec: deep linen sofa, walnut coffee table, oak floor, warm plaster walls.
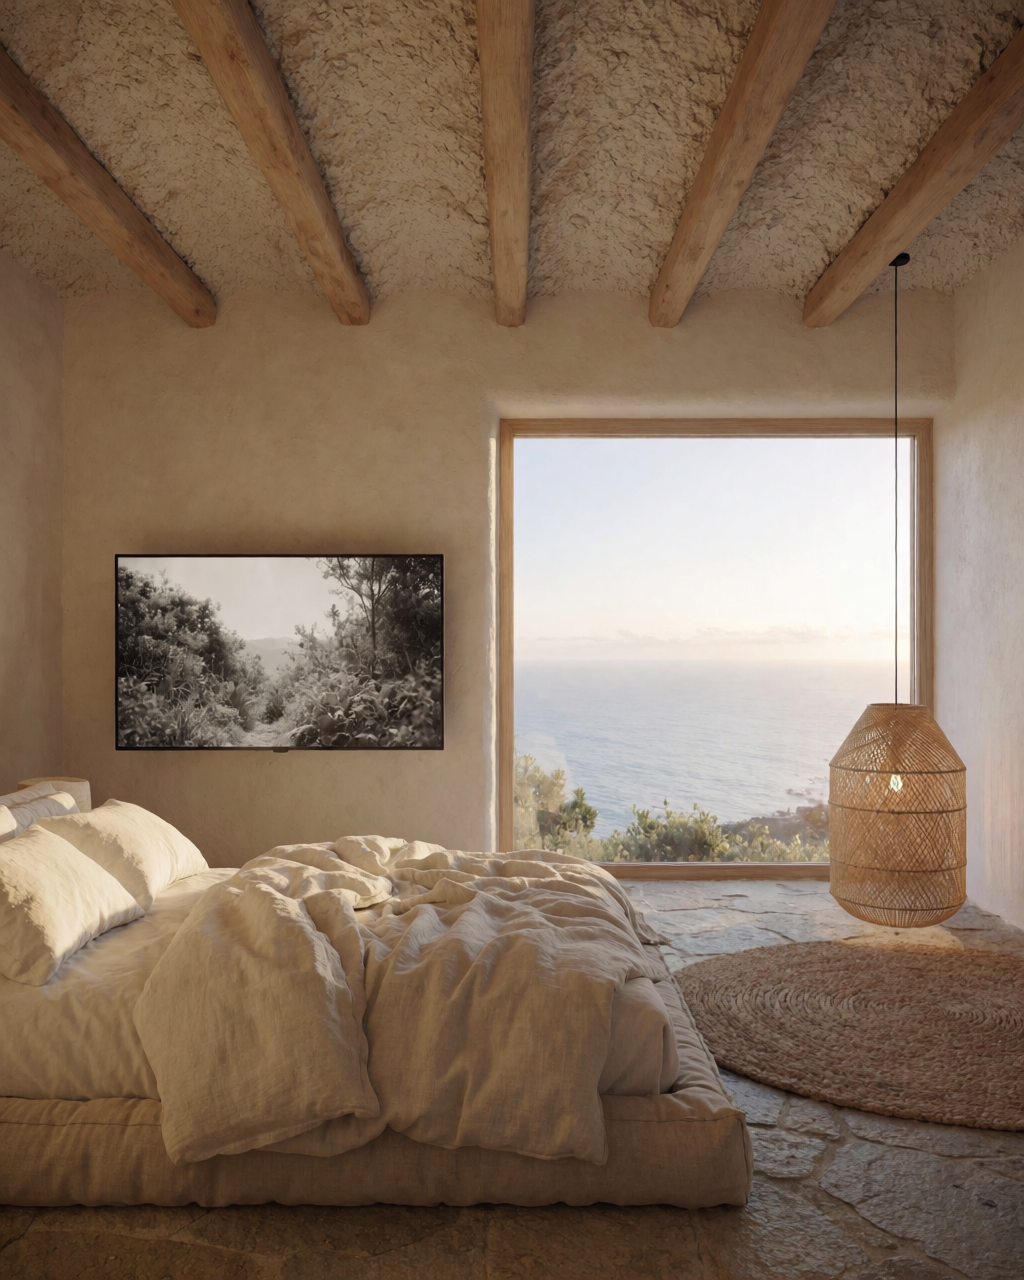
Phase 7 — Interior, master bedroom
The private side of the house. Calmer, more restrained. Low platform bed, warm plaster walls, ocean view through a large window. Soft early morning light.
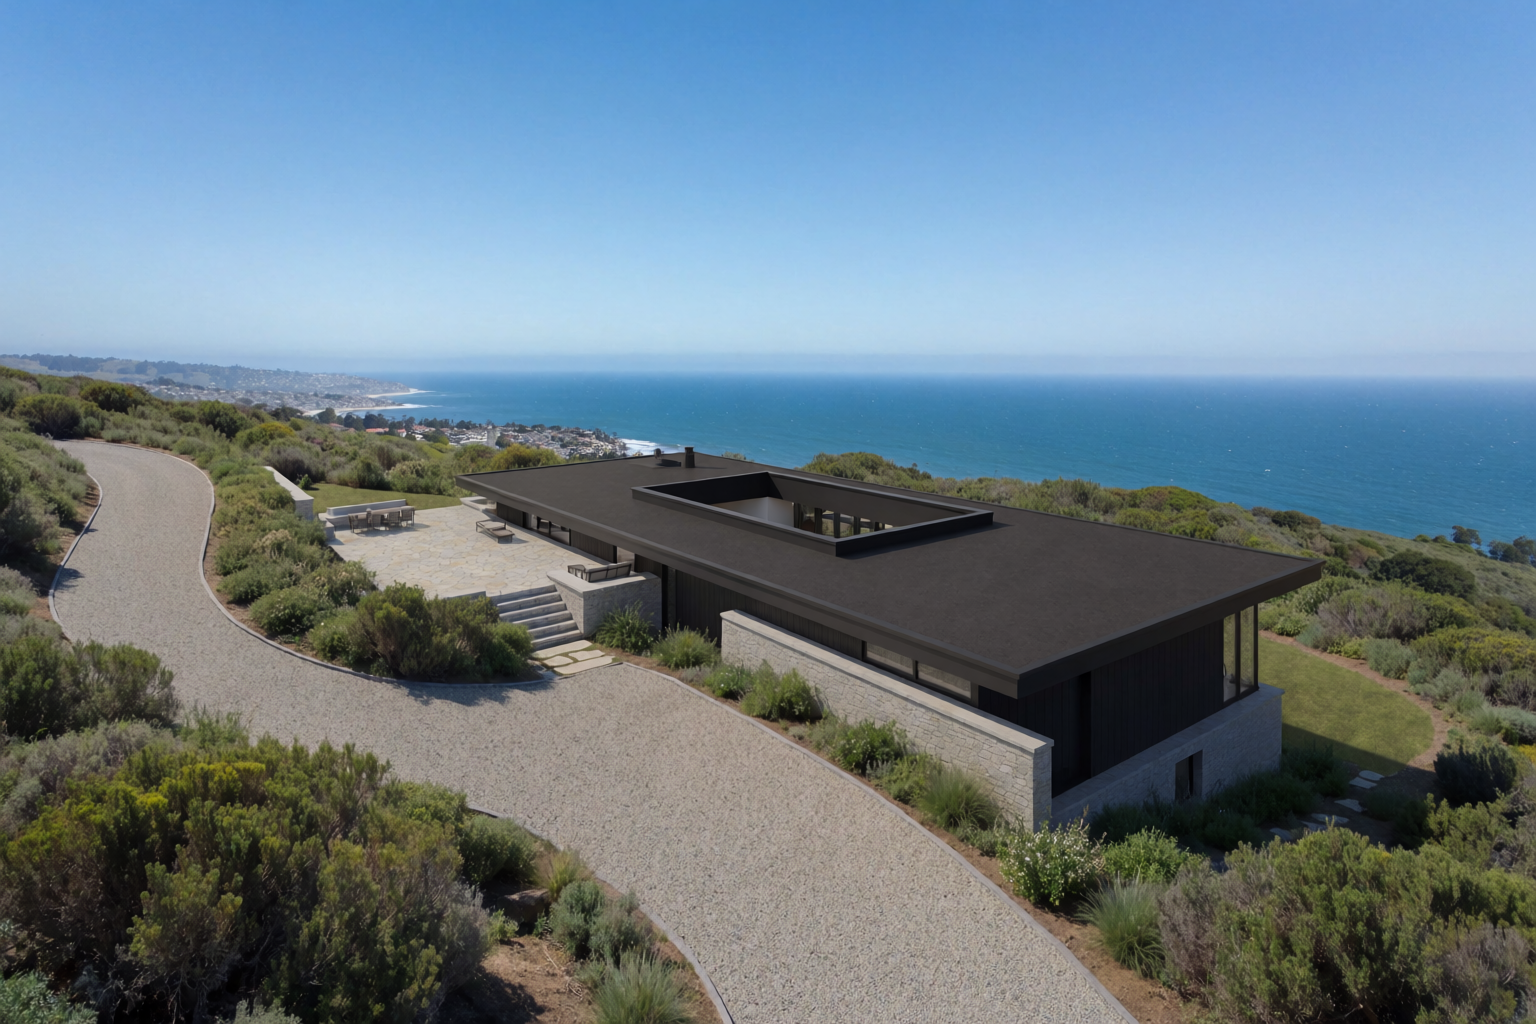
Phase 8 — Aerial overview
The final image for the client board. An aerial that shows the project sitting in its full context — the slope, the road, the town below, the relationship to neighbours.
The client board
Eight images. One project. One conversation that goes from “I have an idea about a house on the coast” to “here is your house, in your light, in your site, with your materials, inside and out.”
The traditional workflow takes weeks to assemble this. The Krea 2 workflow takes an afternoon. The difference is not the quality of the images. The difference is what the architect spends the rest of the week doing.
Prompt patterns for project-consistent imagery
The hardest part of this workflow is keeping the project visually consistent across all eight phases. A few patterns that hold:
- Write a “project brief” you reuse across every prompt. “Contemporary low-slung hillside coastal house, warm timber and concrete facade, three cascading volumes, infinity pool, Pacific coast slope, native landscaping” — this phrase appears in every prompt for the project.
- Train a LoRA on your best three or four renders. Once you have the design locked, a LoRA gives you guaranteed consistency on every future render of the same building.
- Use one of the strong renders as an image reference for the others. The model preserves material and lighting language across references.
- Build a mood board for the project’s visual world. Reference photos of similar coastal projects, the specific materials, the light quality. Every generation against the board carries the same atmosphere.
Where this fits
The pitching workflow is the integration article. It is what happens when you stop thinking of Krea 2 as “an AI image tool” and start thinking of it as the layer between your sketches and your client. The other articles in this series — sketch to render, styles, site context, materials and lighting, interiors, massing — are the techniques. This is the workflow that strings them together.
Pitch your next project in Krea 2
Free to start. LoRA training, image references, and mood boards included on every plan.
Open Krea 2